Top Home Recording Tips for Guitarists to Boost Your Sound
Category: Guitar Gear
Mastering Home Recording: Essential Tips for Guitarists
If you're a guitarist eager to bring your playing and compositions to life with home recordings, you've arrived at the right place. Whether you're strumming acoustic melodies or shredding electrified solos, recording high-quality guitar tracks at home can feel daunting without the right guidance. Maybe you're struggling with capturing the authentic tone of your instrument, unsure about gear choices, or overwhelmed with the technical details of audio interfaces and DAWs. This post is tailored specifically for guitar enthusiasts like you—someone with a passion for great tone and a desire to produce polished tracks without heading into a professional studio.
We’ll navigate the crucial steps from selecting the best recording setup to smart microphone placement, effective signal chain use, and mixing tips that preserve your unique style. Unlike generic tutorials, this guide dives deep into home recording through the lens of guitarists, considering your particular challenges and interests. Whether you're a beginner or have some experience, our clear and actionable advice will help elevate your recordings to sound professional and vibrant. Stick around to unlock techniques and gear insights that will instantly upgrade your home recording sessions.
- Mastering Home Recording: Essential Tips for Guitarists
- Choosing the Right Home Recording Gear for Guitarists
- Setting Up Your Home Studio: Acoustic Treatment, Optimal Room Setup, and Minimizing Background Noise
- Essential Recording Software and DAW Recommendations for Guitarists
- Microphone Techniques for Guitar Recording: Capturing Authentic Electric and Acoustic Tones
- Direct Input (DI) vs. Amp Miking: Pros, Cons, and Blending for Maximum Tonal Flexibility
- Signal Chain and Effects Management: Optimizing Pedal Placement, Amp Modeling, and Recording Techniques
- Recording Multiple Guitar Tracks and Layering: Tips for Double-Tracking, Harmonizing, and Creating Rich Textures in Your Mixes
- Mixing Guitar Recordings: EQ, Compression, Stereo Placement, and Reverb Strategies
- Common Recording Pitfalls and How to Avoid Them: Dealing with Latency, Phase Issues, Clipping, and Other Technical Challenges
- Improving Your Workflow and Getting Inspired: Organizing Sessions, Tracking Tips, and Creative Ideas for Productive Home Recording
Choosing the Right Home Recording Gear for Guitarists
Selecting the ideal home recording gear is a pivotal step for guitarists looking to capture their best tone without breaking the bank or overwhelming their setup. Whether you’re a budget-conscious beginner or a more advanced player aiming to upgrade your studio, having the right audio interfaces, microphones, headphones, and monitors can significantly enhance your recording quality and workflow.
Audio Interfaces: The Heart of Your Setup
For guitarists, an audio interface with instrument-level inputs (Hi-Z) is essential to preserve the clarity and dynamics of your guitar signal. On a budget, models like the Focusrite Scarlett Solo or PreSonus AudioBox USB deliver excellent sound quality with simple plug-and-play usability. For advanced setups, interfaces such as the Universal Audio Apollo Twin or Audient iD14 offer superior preamps, low latency monitoring, and expanded I/O for multi-mic or multi-instrument recording sessions.
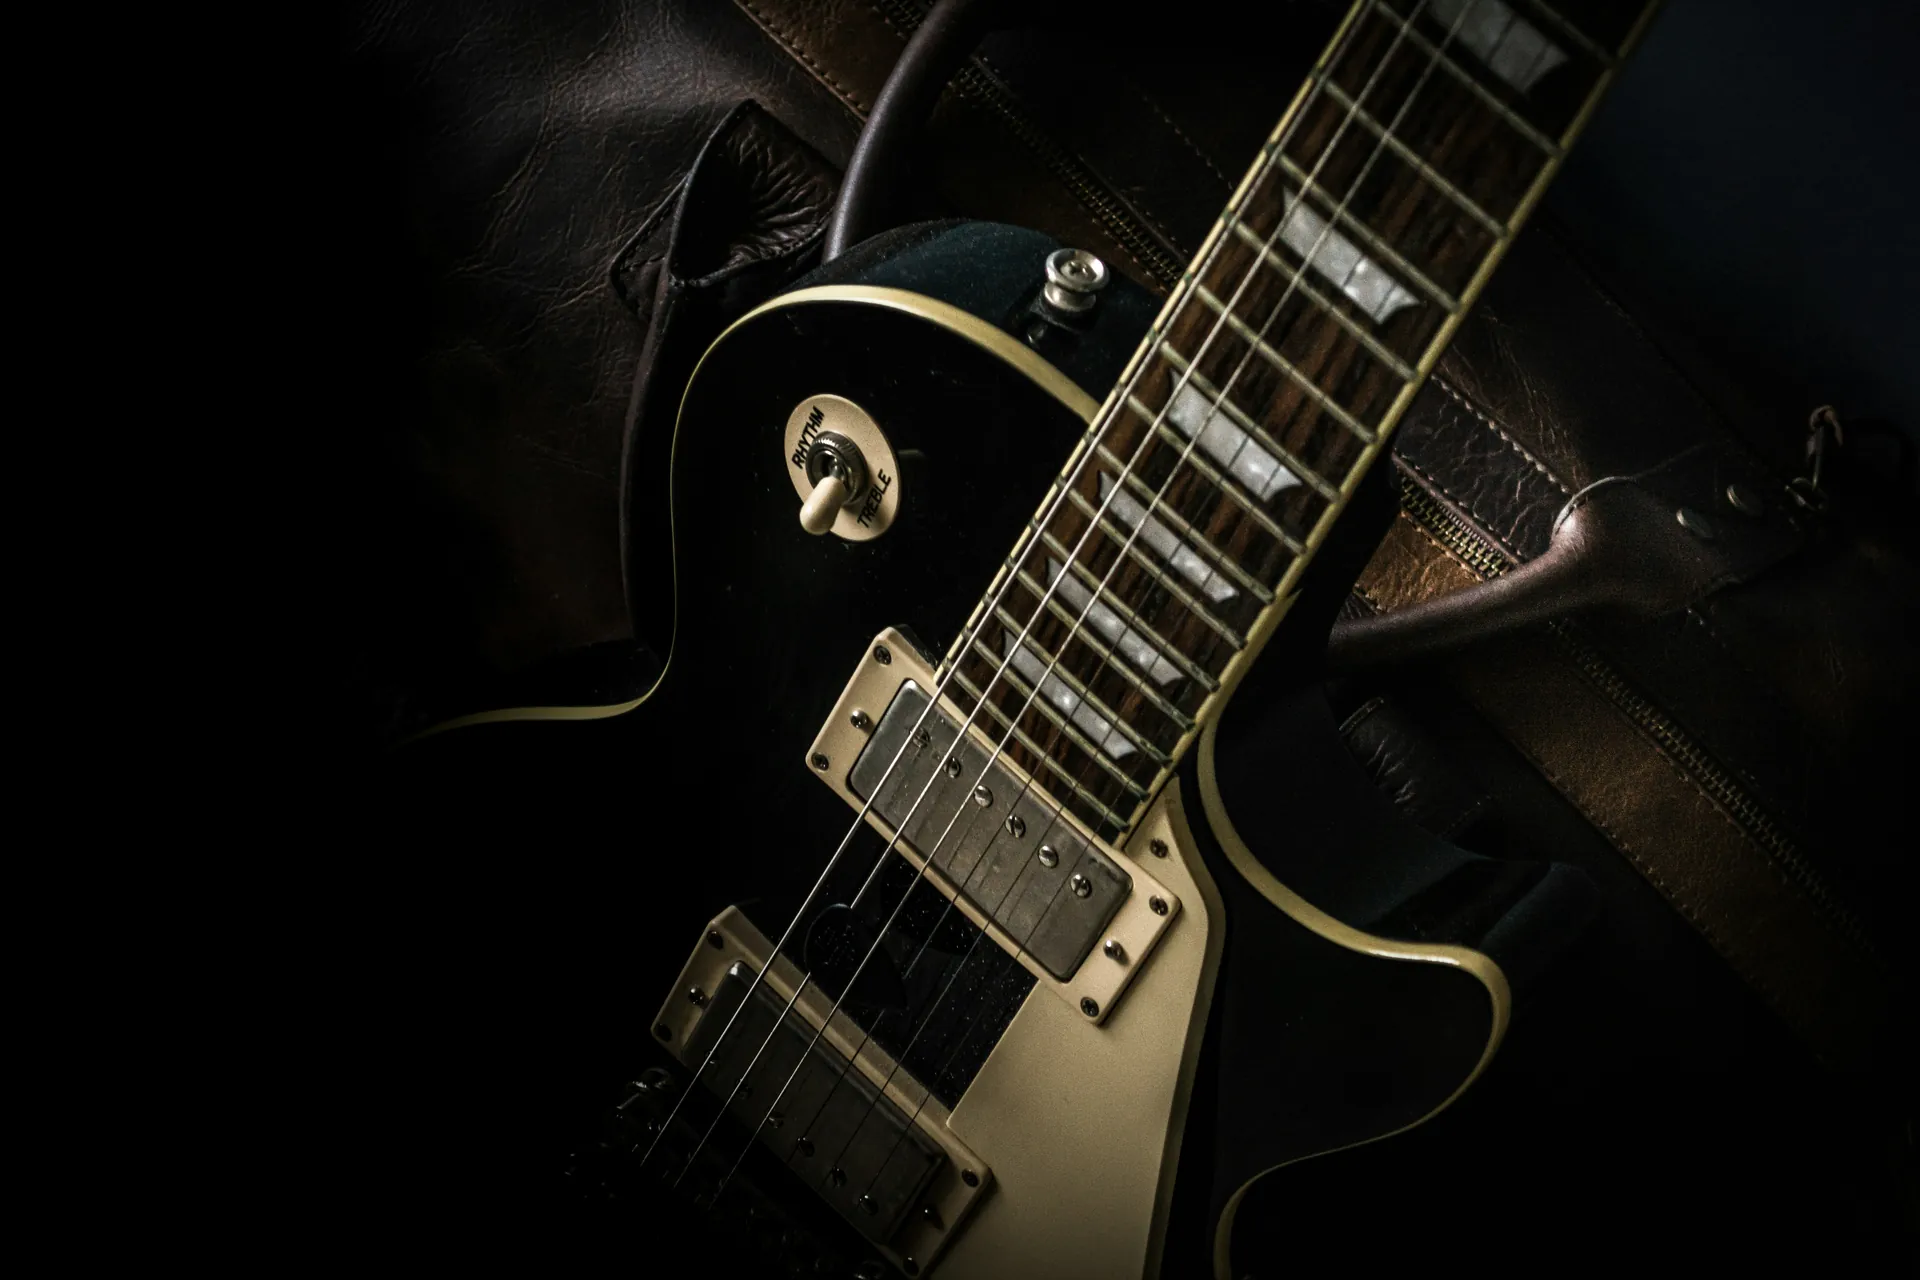
Microphones: Capturing Your True Guitar Tone
Choosing the right microphone depends on whether you’re recording electric guitar amps or acoustic guitars. Budget-friendly dynamic mics like the Shure SM57 remain industry standards for capturing amp tones with punch and clarity. For acoustic guitars, condensers such as the Audio-Technica AT2020 or Rode NT1-A offer detailed response and warmth. In higher-end setups, small-diaphragm condensers or ribbon mics add rich harmonic content that can make your guitar recordings stand out.
Headphones and Studio Monitors: Accurate Mixing and Monitoring
Accurate monitoring is crucial when tracking and mixing guitar recordings. Affordable headphones like the Audio-Technica ATH-M50x or Sony MDR-7506 provide detailed sound isolation and natural frequency response perfect for critical listening. For more serious home studios, investing in nearfield studio monitors such as Yamaha HS5 or KRK Rokit 5 helps you hear the full spectrum of your guitar tone and mix balance, enabling better decisions during production.
By carefully selecting home recording gear optimized for guitarists—balancing budget with performance—you’ll establish a solid foundation to capture authentic, professional-quality guitar sounds right from your own space.
Image courtesy of Photo By: Kaboompics.com
Setting Up Your Home Studio: Acoustic Treatment, Optimal Room Setup, and Minimizing Background Noise
Creating a dedicated home studio space optimized for recording guitar is just as crucial as selecting quality gear. Without proper acoustic treatment and thoughtful room setup, even the best equipment can capture unwanted reflections, muddiness, and background noise that degrade your guitar tone. Understanding the basics of treating your room, positioning your microphone, and minimizing environmental noise will ensure your recordings are clear, crisp, and professional-sounding.
Acoustic Treatment Basics for Guitarists
To capture pure guitar tones, your home studio needs to control sound reflections and reduce echo. Start with these fundamentals:
- Absorption Panels: Placing foam or fabric-wrapped panels at first reflection points—usually side walls and behind the mic—helps absorb mid to high frequencies that cause harshness.
- Bass Traps: Corners of rooms often build up low-frequency energy that can make recordings sound boomy or muddy. Installing bass traps in corners reduces these unwanted resonances.
- Diffusers: To avoid a “dead” sound and maintain natural ambiance, diffusers scatter sound waves instead of absorbing them, helping maintain clarity and depth.
Even simple DIY foam panels or thick blankets can make a significant improvement in untreated rooms by reducing reverb and unwanted coloration in guitar tracks.
Optimal Room Setup and Microphone Placement
Positioning your guitar, mic, and recording equipment thoughtfully within your room can drastically affect the tone you capture:
- Choose a quiet, carpeted or carpeted area away from noisy appliances or vents to reduce ambient noise.
- Keep your guitar amp or acoustic guitar several feet from reflective surfaces like bare walls or windows to avoid unwanted sound reflections.
- Experiment with mic placement, starting around the 12th fret for acoustics or near the amp speaker center for electric guitar, adjusting distance and angle to find the sweet spot without room noise bleed.
Minimizing Background Noise for Clear Recordings
Clean, noise-free signal capture is essential for professional guitar recordings. Take these steps to minimize interference:
- Turn off fans, air conditioners, and other noisy electronics while recording.
- Use noise gates and pop filters where possible to reduce unwanted hums, buzzes, or plosives.
- Consider recording during quieter times of day to avoid external noise pollution like traffic or household activity.
- Use balanced cables and proper grounding to reduce electrical interference and hum.
By combining effective acoustic treatment, smart room layout, and dedicated noise control, your home studio will become a sonic haven tailored to capturing your guitar’s true voice with pristine clarity — a critical foundation for any serious guitar recording setup.

Image courtesy of Tima Miroshnichenko
Essential Recording Software and DAW Recommendations for Guitarists
Choosing the right Digital Audio Workstation (DAW) and recording software is a cornerstone of capturing and shaping guitar tones effectively in your home studio. A DAW tailored for guitar recording offers seamless integration with audio interfaces, flexible track management, and built-in effects that highlight your instrument’s nuances. Below are some of the most popular DAWs favored by guitarists, featuring guitar-friendly tools, amp simulators, and versatile plug-in support to elevate your guitar productions.
Top DAWs for Guitar Recording with Guitar-Friendly Features
-
Ableton Live
Known for its intuitive workflow and live performance capabilities, Ableton Live offers easy clip-based recording and editing. Guitarists benefit from its built-in amp simulation plug-ins, flexible routing, and seamless MIDI integration for external effects devices and controllers. -
Logic Pro X (Mac Only)
Logic Pro X is a powerhouse for guitarists thanks to its extensive suite of guitar amp and pedalboard effects, including the acclaimed Amp Designer and Pedalboard plug-ins. Its user-friendly interface, alongside high-quality virtual instruments and comprehensive mixing tools, makes it a top choice for Mac users. -
Reaper
Reaper is a highly customizable, budget-friendly DAW with a tiny footprint. It excels at multi-track guitar recording and offers low latency performance. Guitarists appreciate Reaper’s compatibility with a huge variety of third-party plug-ins and its ability to create complex signal chains easily. -
Pro Tools
As an industry standard, Pro Tools delivers rock-solid audio recording, editing, and mixing capabilities. Guitarists can use Pro Tools’ powerful track comping and automation to sculpt nuanced performances. Its integration with hardware and broad plug-in support ensures professional-grade results.
Must-Have Plug-Ins and Effects for Guitarists
-
Amp Simulators:
Emulators like Neural DSP, Positive Grid BIAS FX, and IK Multimedia AmpliTube replicate real amp and cabinet tones with great accuracy, letting you experiment with countless sounds without needing physical amps. -
Cabinet Impulse Responses (IRs):
Loading IRs within your amp simulator or DAW adds authentic speaker cabinet textures, improving the realism of direct guitar recordings. -
Saturation and Overdrive:
Plugins such as Soundtoys Decapitator or Native Instruments Guitar Rig add warmth and edge by emulating analog tube distortion, enhancing your guitar’s dynamic presence. -
Delay and Reverb:
Quality spatial effects like Valhalla VintageVerb or EchoBoy provide depth and ambiance, crucial for creating immersive guitar tones that sit well in mixes. -
EQ and Compression:
Effective tone-shaping and dynamic control with plugins like FabFilter Pro-Q or Waves SSL Compressor polish your guitar tracks and maintain clarity and balance.
Selecting a DAW and plug-ins that integrate smoothly with your recording hardware and match your creative workflow enables you to focus on crafting your best guitar tones. With the right software tools, you can transform your home recordings into polished, studio-quality productions that capture the full expressiveness and detail of your playing.

Image courtesy of Brett Sayles
Microphone Techniques for Guitar Recording: Capturing Authentic Electric and Acoustic Tones
When it comes to recording guitars at home, mastering microphone techniques is essential to authentically capture the nuances and character of both electric and acoustic instruments. Using the right miking approach—whether it's close miking, room miking, or a combination—allows you to control the tone, ambience, and dynamic response of your guitar recordings, unlocking professional-grade sound directly from your home studio.
Close Miking for Precision and Presence
Close miking involves positioning the microphone just a few inches away from the guitar speaker cone or acoustic guitar body. This technique offers a direct, focused sound capturing detailed tonal characteristics with minimal room reflections. For electric guitar amps, placing a dynamic microphone like a Shure SM57 near the speaker’s center or edge alters brightness and warmth, enabling you to tailor your tone. On acoustic guitars, using a condenser microphone pointed at the 12th fret or soundhole balances the string attack and body resonance, providing a rich and intimate tone. Close miking is especially effective for tracking solos or rhythmic parts needing clarity and definition.
Room Miking to Capture Natural Ambience
In contrast, room miking places one or more microphones several feet away from the guitar or amp to capture the natural reverberation and spatial characteristics of your recording environment. This technique adds depth, warmth, and a sense of realism that close miking alone cannot achieve. Experimenting with room mics helps blend clean, direct guitar tones with ambient soundscapes, enhancing overall mix richness. Ideal microphones for room miking include large-diaphragm condensers and ribbon mics that capture smooth, full-bodied tones and subtle room reflections.
Combining Close and Room Mics for Versatile Guitar Recordings
Many professional guitar recordings use a combination of close and room miking to strike a balance between precision and atmosphere. By blending these signals in your DAW, you gain control over how much direct guitar sound versus room ambience is present in the final track. This method works equally well for electric and acoustic guitars, allowing:
- Greater tonal flexibility — emphasize attack or sustain as needed.
- Depth and spatial dimension — making guitar parts sit naturally within the mix.
- Creative expression — layering different mic signals for unique textures and dynamics.
To experiment effectively, start with a close mic capturing the core guitar tone and add one or two room mics positioned at varying distances and angles. Adjust their relative volumes and EQ settings to craft your desired soundstage that best reflects your guitar’s natural character and the vibe you want to achieve.
By applying these microphone techniques—optimized for your home recording environment—you’ll capture authentic, vibrant electric and acoustic guitar tones that translate the true feel of your playing and gear with clarity and professional polish.
Image courtesy of Andrea Piacquadio
Direct Input (DI) vs. Amp Miking: Pros, Cons, and Blending for Maximum Tonal Flexibility
When recording guitar at home, one of the most critical decisions is choosing between Direct Input (DI) recording and mic’ing your amplifier. Each method offers unique advantages and tonal characteristics, and understanding their pros and cons will empower you to capture your best guitar sound. Furthermore, blending DI signals with miked amp sounds in your DAW opens a world of tonal flexibility that can drastically improve your recordings’ depth and presence.
Direct Input (DI) Recording: Clean and Versatile
Recording your guitar directly into your audio interface using a DI box or an instrument input on your interface captures a pure, uncolored signal straight from the guitar’s pickups. The benefits of DI recording include:
- Signal clarity and noise reduction by eliminating background room noise and amp hiss.
- Maximum tonal control with amp simulators and cabinet impulse responses (IRs) applied during mixing.
- Convenient and repeatable setups without requiring amp mic placement or room considerations.
- Easy adjustment of amp parameters after recording when reamping or using digital amp sims.
However, DI signals can sometimes sound sterile and lack the organic warmth and dynamic nuances that come from a real amplifier speaker and room acoustics.
Amp Miking: Authentic Tone and Dynamic Depth
Using a microphone to capture the guitar amp enables you to record the amp’s natural tonal coloration, speaker character, and the effect of your room’s acoustic environment. Amp miking offers:
- Rich harmonic content and dynamic expression often missing in DI recordings.
- The ability to capture the unique vibe of your amp, speaker cabinet, and mic choice.
- Immediate preview of your final guitar tone without reliance on software emulation.
On the downside, mic’ing amps requires more setup time, careful mic placement, and a properly treated room to avoid unwanted reflections or noise. It can also introduce bleed if recording with other instruments simultaneously.
Blending DI and Amp Mic Signals for Ultimate Tone
The most powerful approach to home guitar recording is to capture both DI and miked amp signals simultaneously and blend them in your DAW. This method allows you to combine the precision and flexibility of DI with the warmth and authenticity of amp miking, producing a fuller, richer guitar tone. Key tips for successful blending include:
- Record DI and amp mic signals on separate tracks for independent processing.
- Use amp simulators and cabinet IRs on the DI track to experiment with different sounds.
- Gradually mix in the miked amp track to add organic character and dynamic punch.
- Employ phase alignment tools or manually adjust timing to avoid comb-filtering and phase issues between tracks.
- Apply separate EQ, compression, and effects on each track to emphasize their best qualities — for example, brightening the DI track while adding warmth to the amp mic track.
By merging the strengths of DI and amp miking, guitarists gain unparalleled control over their tone, offering a vast sonic palette that can be tailored for any style, mix, or mood. This hybrid recording strategy has become a staple in professional studios and is equally accessible and beneficial in home studio environments, dramatically enhancing the quality and expressiveness of your guitar recordings.
Image courtesy of Tima Miroshnichenko
Signal Chain and Effects Management: Optimizing Pedal Placement, Amp Modeling, and Recording Techniques
A well-structured signal chain and effective effects management are crucial for guitarists looking to capture professional-sounding home recordings that reflect their true tone. Understanding the best practices around pedal placement, using amp modeling software, and deciding when to record dry versus effected signals empowers you to craft flexible and vibrant guitar tracks that stand out in any mix.
Pedal Placement: Order Matters for Optimal Tone
The sequence of your guitar pedals in the signal chain dramatically influences your tone and how effects interact. While personal preference plays a role, a standard and widely accepted pedal order to start with is:
- Tuner – Always first to ensure accurate tuning without interference.
- Dynamics (compressors) – Tightens your signal and evens out picking dynamics.
- Filters and Wah – Shape tone using wah, envelope filters, or EQ pedals before distortion.
- Gain Stages (overdrives, distortions, fuzzes) – Core tone shaping with various levels of saturation.
- Modulation Effects (chorus, phaser, flanger) – Add movement and texture after distortion.
- Volume Pedal – Allows swells or precise level control after modulation.
- Delay and Reverb – Spatial effects last to create depth and ambience.
This order ensures clarity and prevents unwanted signal clutter. Of course, experimentation is encouraged to discover unique sounds, but starting with this structure helps you avoid common tone issues like muddy distortion or washed-out effects.
Amp Modeling and Recording Dry vs. Effected Signals
Modern amp modeling software and digital effects offer near-studio-quality emulations of classic and boutique amplifiers, cabinets, and pedals, making them invaluable for home recording without extensive physical gear. When integrating amp modeling into your workflow, deciding whether to record dry (clean) guitar signals or fully effected signals is key:
- Recording dry DI signals and applying amp simulation and effects later provides maximum tonal flexibility. This allows you to tweak amp parameters, cabinet selections, and effects in your DAW non-destructively during mixing, accommodating different mix contexts or creative ideas.
- Recording effected signals through pedals and amp modeling captures your live tone and playing dynamics accurately but limits post-recording manipulation since effects are baked into the track.
A hybrid approach often works best: record a clean DI track alongside a processed signal (through pedals or amp sims). This way, you retain the raw performance’s integrity while having immediate access to your desired tone. Additionally, employing re-amping techniques enables you to send recorded dry signals through physical amps or pedalboards later for further tone exploration.
Best Practices for Signal Chain Management in Home Recording
- Use high-quality cables and interfaces with instrument-level inputs to preserve signal integrity and minimize noise.
- Keep pedal power supplies clean and isolated to avoid hum or interference.
- Manage latency carefully when using amp simulators and effects, prioritizing low-latency monitoring for tight performances.
- Record multiple layers and versions of your guitar tracks with varying effects intensity, giving you more options during mixing.
- Always experiment with pedal order and effect parameters to discover your signature sound while maintaining recording clarity.
By carefully managing your signal chain and thoughtfully choosing when to apply effects, you harness the full potential of both hardware and software tools. This strategic approach results in guitar recordings that are rich, dynamic, and adaptable—perfect for professional-quality home productions.
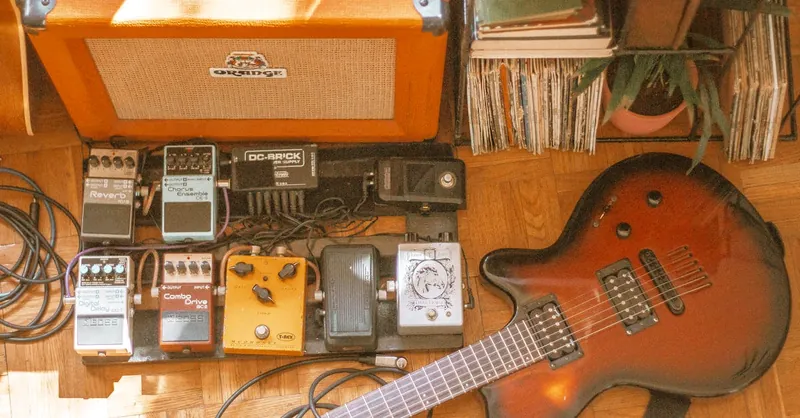
Image courtesy of Alina Vilchenko
Recording Multiple Guitar Tracks and Layering: Tips for Double-Tracking, Harmonizing, and Creating Rich Textures in Your Mixes
To elevate your home guitar recordings from simple one-layer tracks to full-bodied, professional productions, mastering the art of recording multiple guitar tracks and layering is essential. This technique involves recording the same or complementary guitar parts several times and blending them to create a dense, immersive soundscape that adds depth, power, and musical interest.
Double-Tracking for a Fuller, Punchier Guitar Tone
Double-tracking is the process of recording the same guitar part twice and panning the two takes left and right in the stereo field. This simple yet powerful technique creates a wider, thicker tone that instantly enhances your mix. To maximize the effect:
- Record each take with slight variations in timing, dynamics, or picking attack to add natural human feel.
- Maintain consistent tone and amp settings across takes for tonal cohesiveness.
- Pan the tracks evenly (e.g., hard left and right) to generate stereo width.
- Use subtle EQ or compression differences on each track to create separation and avoid phase issues.
Double-tracking is particularly effective for rhythm guitar parts, giving your arrangement a robust foundation while allowing lead lines to cut through more clearly.
Harmonizing and Multi-Layered Arrangements for Rich Musical Textures
Beyond simple doubling, layering harmonized guitar parts opens creative possibilities to enrich your compositions. By recording complementary melodies, counter-melodies, or harmonies, you build complex textures that engage listeners and add emotional nuance.
When layering harmonies:
- Choose intervals that suit your style and key, such as thirds, fifths, or octaves.
- Experiment with different playing techniques (e.g., fingerpicking, palm muting) to differentiate layers.
- Balance levels carefully to maintain clarity between parts without muddiness.
- Consider subtle effects like delay or chorus on harmony tracks for added dimension.
Additionally, layering clean, distorted, or ambient guitar tracks can dramatically expand your sound palette, blending organic attack with atmospheric depth.
Best Practices to Avoid Phase Issues and Maintain Clarity
When recording multiple guitar tracks, phase cancellation can lead to thin or hollow sounds if the tracks are not properly aligned. To prevent this:
- Use phase alignment tools or manually nudge waveforms in your DAW to ensure timing coherence.
- Avoid recording all layered parts in exactly the same microphone position or room setup; slight changes reduce frequency masking.
- Apply subtle EQ cuts or boosts on overlapping frequency ranges to give each layer space in the mix.
By thoughtfully layering guitar tracks with attention to harmony, timing, and tonal balance, you create rich, dynamic mixes that emphasize your playing style and creative vision. This approach transforms your home recordings into captivating, full-spectrum guitar productions ready for any listening platform.

Image courtesy of Brett Sayles
Mixing Guitar Recordings: EQ, Compression, Stereo Placement, and Reverb Strategies
Mixing your guitar recordings effectively is crucial to making them sit perfectly in the mix, ensuring clarity, presence, and musicality. A polished mix not only highlights your playing but also balances your guitar tracks with other instruments, creating a cohesive and professional sound. Key tools such as EQ, compression, stereo placement, and reverb serve as the cornerstone techniques to shape your guitar tone and carve out sonic space.
Equalization (EQ): Sculpting Your Guitar Tone
EQ is essential for tonally refining your guitar recordings by cutting or boosting specific frequency ranges to avoid clutter and enhance character. For electric guitar tracks, typically:
- Cut low-end rumble below 80-100 Hz to reduce muddiness, as the bass guitar usually occupies this region.
- Boost midrange frequencies (around 800 Hz to 2 kHz) to add presence and help the guitar cut through the mix.
- Apply gentle high-frequency boosts (5 kHz and above) to accentuate string articulation and brightness if the tone feels dull.
For acoustic guitar, prioritize clarity by reducing boxiness around 200-400 Hz and bringing out sparkle with a slight boost in the 5-7 kHz range. Using a parametric EQ allows surgical adjustments that maintain natural guitar tone without harshness.
Compression: Controlling Dynamics and Enhancing Sustain
Applying compression on guitar tracks smooths out volume fluctuations, controls peaks, and can enhance sustain and body. Use moderate settings with:
- A medium attack to preserve initial string attack and pick dynamics.
- A medium release to maintain natural decay without pumping effects.
- A ratio between 3:1 and 5:1 for controlled, musical compression that doesn't squash the performance.
Compression is especially beneficial on rhythm tracks to keep a steady presence, and on lead parts to maintain consistent volume during solos.
Stereo Placement: Creating Width and Balance
How you position guitar tracks in the stereo field has a major impact on the mix’s spatial feel and separation. Consider these mixing tips:
- Pan rhythm guitar double-tracks hard left and right to widen the stereo image and create a thick foundation.
- Place lead guitars, harmonies, or ambient layers slightly off-center to maintain focus and avoid masking vocals or other key instruments.
- Use automation to dynamically adjust stereo placement for added interest throughout the song.
Strategic panning prevents frequency masking and gives each guitar part its own space, delivering a clearer and bigger overall mix.
Reverb and Delay: Adding Depth and Ambience
Neutral or subtle reverb enhances the natural ambience of your guitar recordings, helping them blend smoothly without sounding detached or flat. Use these guidelines:
- Choose short to medium decay times for rhythm guitars to add warmth without washing out articulation.
- Use longer, more atmospheric reverbs or delays on lead and ambient parts to create dimension and emotional impact.
- Experiment with pre-delay settings to separate reverb from the direct signal, maintaining clarity and articulation.
- Employ delay effects to complement reverb, adding rhythmic echo and spatial complexity without cluttering the mix.
Balancing dry and wet signals is key; too much reverb or delay can push your guitars back in the mix, while too little can sound unnatural and dry.
By applying these mixing techniques—thoughtful EQ, tasteful compression, intelligent stereo placement, and tasteful reverb—you’ll transform raw guitar recordings into vibrant, clear, and professional-sounding tracks that stand out in any production. Mastering these elements equips you to produce mixes where your guitar playing is both expressive and perfectly integrated with the overall arrangement.
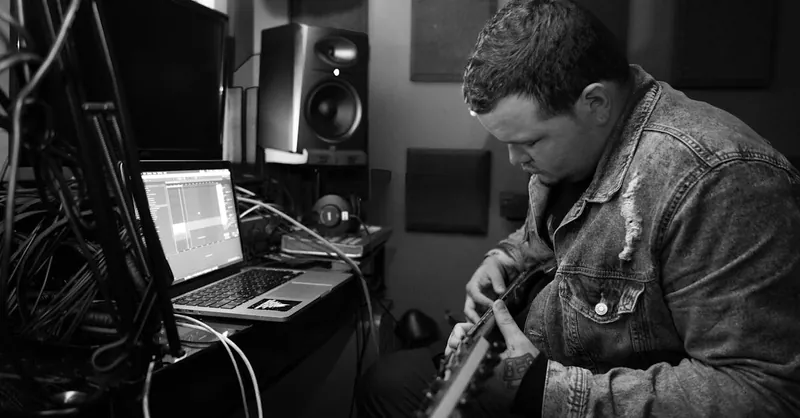
Image courtesy of Brett Sayles
Common Recording Pitfalls and How to Avoid Them: Dealing with Latency, Phase Issues, Clipping, and Other Technical Challenges
Home guitar recording comes with unique technical challenges that can affect the clarity and quality of your tracks if left unaddressed. Understanding and avoiding common pitfalls such as latency, phase issues, clipping, and noise interference is crucial for producing professional-sounding guitar recordings that faithfully capture your tone and performance.
Managing Latency for Tight Performances
Latency—the delay between playing a note and hearing it through your monitoring system—can disrupt your timing and feel when tracking guitar parts. To minimize latency:
- Use an audio interface with low-latency drivers (ASIO for Windows, Core Audio for Mac).
- Track with direct monitoring enabled on your interface to hear your guitar signal before it passes through your DAW’s processing.
- Reduce your DAW’s buffer size during recording sessions (typically 64 or 128 samples) to lower latency without causing audio glitches.
- Bypass CPU-intensive plug-ins like amp sims or reverbs while recording, and add effects later during mixing.
By effectively managing latency, you maintain natural timing and expressiveness, making your home recordings feel as close to an in-person session as possible.
Avoiding Phase Issues When Using Multiple Mics or Layers
When recording guitars with multiple microphones or layering tracks, phase cancellation can cause the sound to become thin, hollow, or weak due to destructive interference between waveforms. To combat phase problems:
- Check the phase alignment of all mic signals by visually inspecting waveforms and nudging tracks in your DAW.
- Use phase invert switches available on many preamps or DAWs to flip polarity if signals are out of phase.
- Maintain consistent mic placement angles and distances while recording multiple tracks.
- Avoid exact duplication of timing and identical mic positions when double-tracking to reduce comb-filtering effects.
Resolving phase issues ensures that your layered guitar tracks combine cleanly and powerfully without losing definition or punch.
Preventing Clipping and Distortion in Guitar Recordings
Clipping occurs when input levels exceed your interface’s or DAW’s maximum threshold, causing digital distortion and ruining the clarity of your recordings. To prevent clipping:
- Set your audio interface’s input gain so that guitar signals peak around -6 dBFS to -12 dBFS, leaving headroom for dynamic peaks.
- Monitor levels carefully when using gain-heavy pedals, high-output pickups, or amp simulators.
- Utilize clip indicators in your DAW tracks to catch any peaks above 0 dB.
- Consider using high-pass filters to remove inaudible low-end rumble that can push levels unnecessarily.
Keeping your signal clean and within healthy levels preserves detail and punch in your guitar tone, avoiding harsh digital artifacts that detract from the musicality of your recordings.
Tackling Noise and Interference for Cleaner Tracks
Guitar recordings are prone to noise issues such as hum, buzz, and hiss, especially with electric guitars and pedals. To reduce unwanted noise:
- Use shielded, high-quality instrument cables and maintain good cable hygiene.
- Keep your guitar and pedals well-maintained, and use battery-powered pedals or isolated power supplies to avoid ground loops.
- Position your setup away from electromagnetic interference sources like fluorescent lights, routers, or computer monitors.
- Apply noise gates or expanders during tracking or mixing to suppress background noise without cutting your sustain or expressiveness.
Addressing noise sources proactively ensures crystal-clear guitar recordings that require less corrective editing and deliver professional results.
By understanding these common home recording pitfalls and applying practical solutions to latency, phase alignment, clipping, and noise challenges, guitarists can vastly improve their track quality. This technical groundwork complements your creative process, helping your guitar recordings sound focused, natural, and ready for mixing and production.
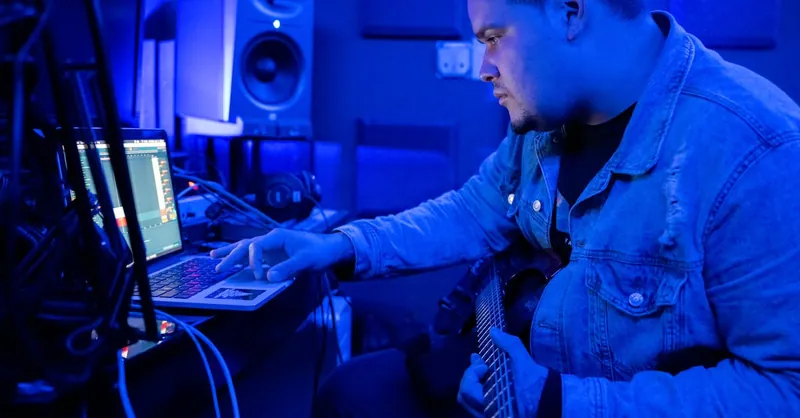
Image courtesy of Brett Sayles
Improving Your Workflow and Getting Inspired: Organizing Sessions, Tracking Tips, and Creative Ideas for Productive Home Recording
Maximizing productivity and creative flow during your home guitar recording sessions starts with establishing an organized and efficient workflow. A cluttered workspace or chaotic session management can distract from your playing and stall progress, while a streamlined setup fosters inspiration and keeps the focus on capturing your best performances. Begin by structuring your session files clearly—label tracks with precise names like “Rhythm Guitar Left” or “Lead Solo DI”, and organize takes using playlists or comping tools native to your DAW. This practice not only saves time when revisiting your project but also simplifies editing and mixing later, ensuring your creative energy is spent crafting music rather than hunting for files.
Tracking tips to boost your workflow include setting up templates with your favorite guitar input chains, basic effects, and routing configurations. Having these ready means you can jump straight into recording without wasting time on repetitive setup tasks. Additionally, use markers and session notes to track ideas, favorite takes, or areas needing improvement, helping you maintain clarity throughout the recording process. To keep your sessions fun and inspiring, incorporate creative rituals like experimenting with alternate tunings, recording spontaneous jam sections, or using unique mic placements to discover fresh textures. Finally, schedule regular breaks and vary your recording goals—shifting from technical perfection to expressive improvisation—to balance focus with playfulness, ensuring your home studio remains a place where great guitar tones and ideas flourish organically.

Image courtesy of Tima Miroshnichenko