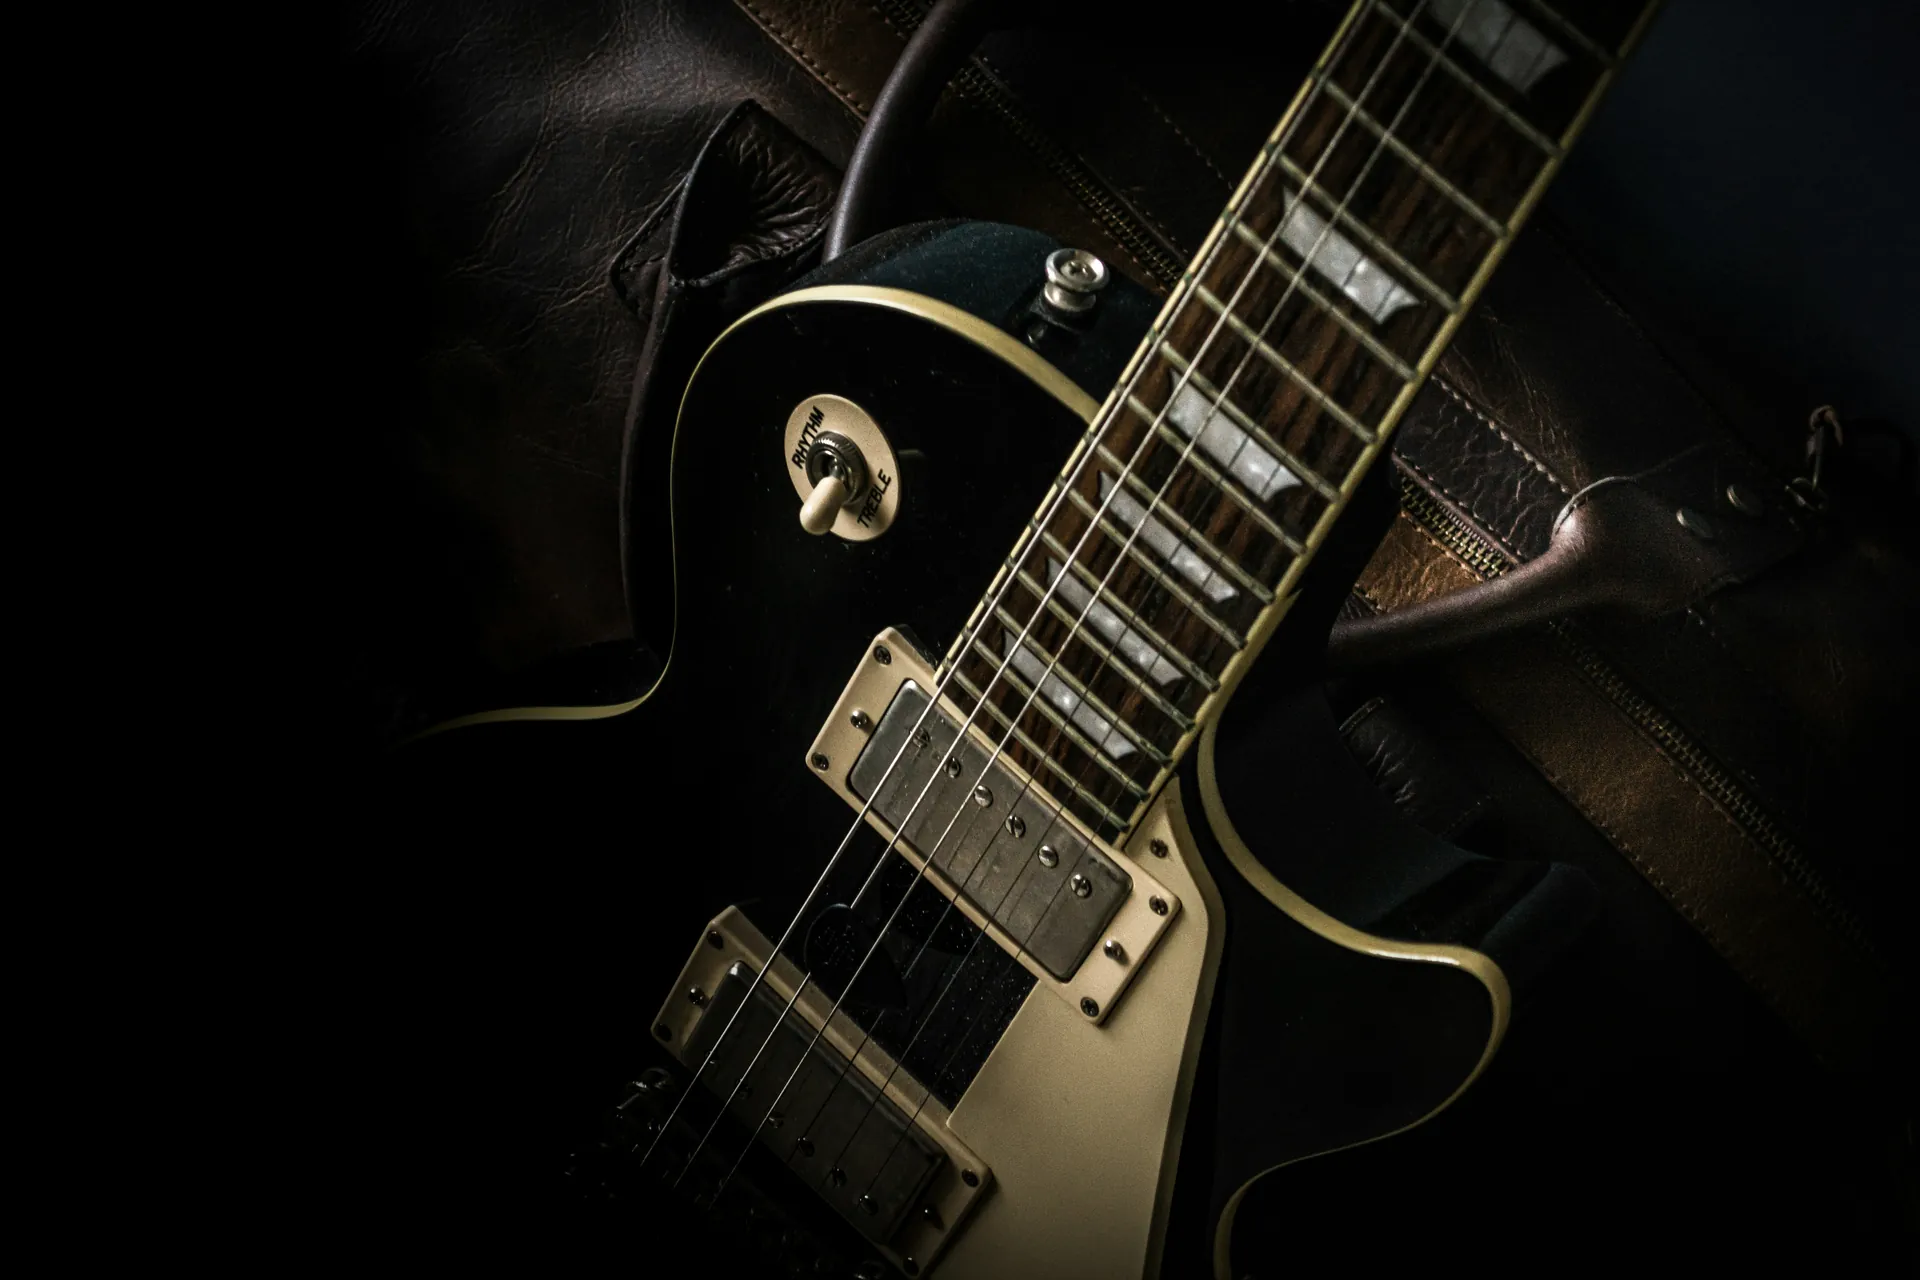
Top Home Recording Tips for Guitarists: Capture Pro Sound
Category: Guitar Gear
Master Home Recording: Essential Tips for Guitarists
If you're a guitarist eager to bring your playing into the world of home recording, you’ve landed in the right place. Whether you're a bedroom musician experimenting with multitrack layering or an intermediate player striving to craft professional-sounding demos, this guide addresses the key hurdles you face: capturing your instrument's true tone, managing limited gear, and navigating recording software with confidence. Many guitarists struggle with frustratingly flat or noisy recordings, uncertain of the best miking techniques, interface setup, or plugin choices. This post cuts through the clutter and reveals tried-and-true strategies to elevate your home recordings. Unlike generic tutorials, our advice is tailored specifically for guitar players — from selecting the right audio interface and microphones to dialing in amp simulations and leveraging effects — all designed to help you unlock your sound at home with limited resources. By the end, you’ll understand essential recording workflows, gear recommendations, and mixing tips that suit your style and budget. If you want your guitar tracks to sound vibrant, clear, and studio-ready without an expensive setup, keep reading. We dive deep into practical, actionable tips that will empower you to confidently record your best guitar tone, whether acoustic or electric.
- Master Home Recording: Essential Tips for Guitarists
- Choosing the Right Space: Optimize Your Home Recording Environment
- Essential Gear for Home Recording: Must-Have Items for Guitarists
- Microphone Techniques for Guitar Recording: Capturing the Perfect Tone
- Direct Input vs. Amp Miking: Pros and Cons of Capturing Guitar Tones
- Using Amp Simulators and Effects Plugins: Sculpt Your Guitar Tone Inside Your DAW
- Recording Workflow and Signal Chain Best Practices
- Editing and Mixing Guitar Tracks at Home: Techniques for a Polished Sound
- Troubleshooting Common Issues: Solutions for Noise, Latency, Clipping, and Monitoring Challenges
- Expanding Your Setup Over Time: Strategic Upgrades and Essential Additions
- Exporting and Sharing Your Tracks: Finalizing Mixes, Mastering Basics, and Preparing Audio for Streaming, Collaboration, or Demos
Choosing the Right Space: Optimize Your Home Recording Environment
Selecting the ideal space for recording guitar at home is crucial for capturing clean, professional-quality tone. Even the best gear and techniques can be undermined by an untreated or noisy room. When scouting your home for a recording spot, prioritize a quiet area with minimal background noise—from street traffic, appliances, or electronics—as excessive ambient sound will bleed into your tracks and complicate mixing. Smaller rooms with hard, reflective surfaces tend to cause unwanted echoes and harsh reflections that can muddy the clarity of your guitar recordings.
To optimize any chosen space, start by addressing common acoustic challenges:
- Control Reflections: Use absorbent materials like thick curtains, rugs, or foam panels on walls and floors to reduce slapback echoes. Placing a bookshelf or filling corners with bass traps helps tame low-frequency buildup.
- Minimize External Noise: Record during quieter times and use weather stripping or door seals to block outside sounds.
- Create a Dedicated Recording Zone: Designate a specific area for your gear and playing setup, avoiding rooms with heavy foot traffic or noisy HVAC systems.
Even a few simple tweaks can drastically improve your recorded guitar tone's warmth and definition. By carefully choosing and treating your recording space, you lay the foundation for cleaner, more controlled guitar tracks that require less corrective mixing later on. This attention to environment will let your playing shine through authentically, whether you’re capturing electric amp tones or delicate acoustic fingerpicking at home.
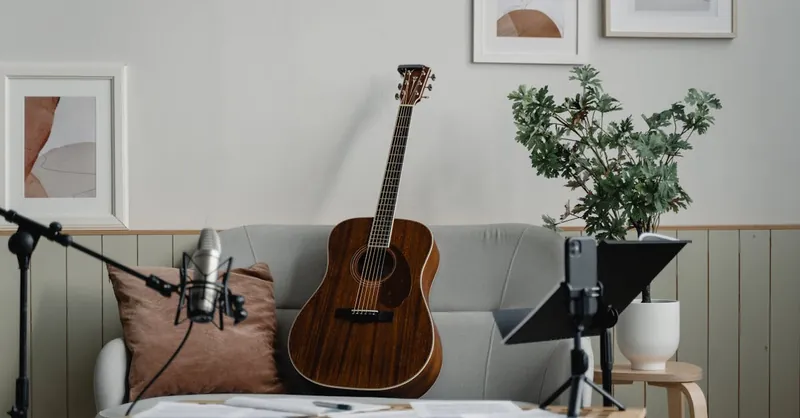
Image courtesy of Tima Miroshnichenko
Essential Gear for Home Recording: Must-Have Items for Guitarists
When it comes to setting up your home recording rig, having the right essential gear can make all the difference in capturing your guitar’s true character and producing clear, professional-quality tracks. Whether you play electric or acoustic guitar, the following items form the backbone of an effective home studio tailored specifically for guitarists.
1. Audio Interface: The Heart of Your Home Studio
An audio interface is the crucial bridge between your guitar and computer, converting analog signals into high-quality digital audio. Look for interfaces with:
- High input quality and low latency for seamless real-time monitoring.
- Instrument-level inputs (Hi-Z inputs) designed explicitly for guitars, preserving tonal detail.
- Multiple input/output options if you plan to record amps and microphones simultaneously.
Popular budget-friendly models like the Focusrite Scarlett series or PreSonus AudioBox deliver excellent sound quality and driver stability essential for smooth recording sessions.
2. Microphones: Capturing Amp and Acoustic Tones
Choosing the right microphone depends on your recording approach:
- For electric guitar amps, dynamic microphones such as the Shure SM57 remain a studio staple due to their durability and ability to capture midrange punch.
- To capture acoustic guitars with clarity and detail, consider condenser microphones that offer a broader frequency response.
- For versatility, a small diaphragm condenser or ribbon mic can add dimension to both amp and acoustic recording.
3. Cables and Accessories: Don’t Overlook These
Good quality instrument cables and XLR cables are a must to maintain signal integrity and minimize noise. Invest in:
- Shielded cables with secure connectors.
- Cable management tools to reduce tangling and wear.
- A reliable mic stand and pop filter if recording vocals alongside guitar.
4. Headphones and Monitors: Accurate Listening
Monitoring your recordings clearly is essential. Choose closed-back headphones for tracking to prevent bleed into your mic, and reliable studio monitors with a flat frequency response for mixing your guitar tones accurately.
5. Digital Audio Workstation (DAW): Your Recording Software
The DAW is where you record, edit, and mix your guitar tracks. Guitarists benefit from DAWs with:
- User-friendly interfaces and guitar-focused features.
- Integrated amp simulators and effects.
- Compatibility with VST plugins for expanding tonal possibilities.
Popular DAWs among guitarists include Ableton Live, Logic Pro X (Mac), Reaper, and Studio One. Many include built-in amp modeling suites perfect for recording electric guitar without a physical amp.
By investing in these fundamental pieces of gear, tailored to the specific needs of guitarists, you’ll ensure your home recordings sound cleaner, more dynamic, and ready for mixing. Pairing quality gear with a treated space and effective techniques puts you well on your way to achieving professional-level guitar recordings from your own home studio.
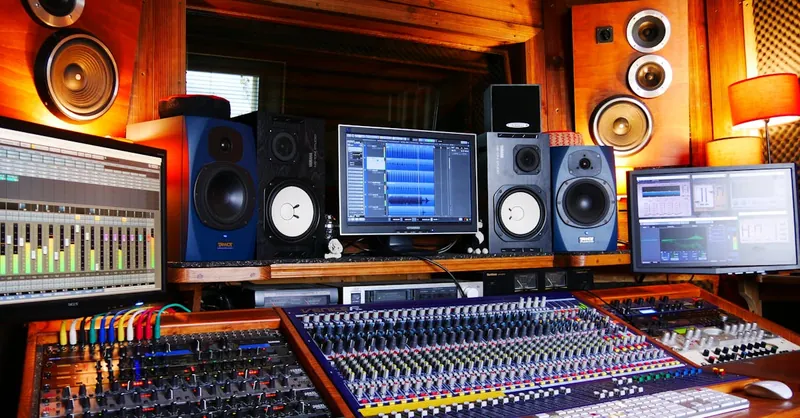
Image courtesy of Tom de Monteiller
Microphone Techniques for Guitar Recording: Capturing the Perfect Tone
Mastering microphone placement is key to recording electric and acoustic guitars with clarity, warmth, and character. Whether you're miking an amp or an acoustic guitar, understanding the strengths of dynamic and condenser microphones and how to position them will vastly improve your home recordings.
Miking Electric Guitar Amps
For electric guitar amps, dynamic microphones like the Shure SM57 are industry-standard due to their focused midrange response and durability. Here are essential mic placement tips:
- Close Miking: Position the mic about 1-3 inches from the speaker grille, aiming slightly off-center from the cone to balance brightness and warmth. This captures the direct amp tone with punch and definition.
- Experiment Angle: Tilting the mic at different angles toward the speaker cone affects tonal brightness—pointing directly at the center yields sharper highs, while moving toward the edge softens harshness.
- Distance Miking: Placing the mic 6-12 inches away captures more room ambience and natural reverb, adding depth. Combining close and distance mics allows greater control during mixing.
- Blend Multiple Mics: Consider using a secondary condenser mic to complement the dynamic mic, capturing high-frequency detail and spatial ambience. This layered approach mimics professional studio workflows.
Recording Acoustic Guitars With Condenser Mics
Acoustic guitars benefit from the sensitivity and wide frequency response of condenser microphones, making them ideal for capturing subtle nuances of fingerpicking and strumming:
- 12th Fret Placement: Position the microphone 6-12 inches from the 12th fret, angled slightly towards the guitar neck. This spot balances fret noise, body resonance, and string articulation for a natural sound.
- Sound Hole Caution: Avoid pointing the mic directly at the sound hole, as this often results in boomy, exaggerated low frequencies.
- Use Stereo Pairs: For richer acoustic recordings, set up two small-diaphragm condensers in an XY or spaced pair configuration. This technique adds stereo width and realism.
- Room Ambience: Don’t neglect capturing some room sound by placing an additional mic farther away. A clean, well-treated room enhances the natural acoustic feel without overwhelming the close mic track.
Additional Tips for Microphone Technique
- Use a quality mic stand with shock mount to reduce handling noise and vibrations.
- Check phase alignment when blending multiple microphones to avoid thin or hollow sounds.
- Pop filters are generally more critical for vocals but can help reduce plosives if recording vocal harmonies alongside guitar.
Fine-tuning microphone techniques tailored to your electric or acoustic guitar setups is an essential step toward achieving vibrant, clear, and professional-sounding home recordings. Don’t hesitate to experiment with positioning and mic types; small adjustments make a world of difference in capturing your unique guitar tone.
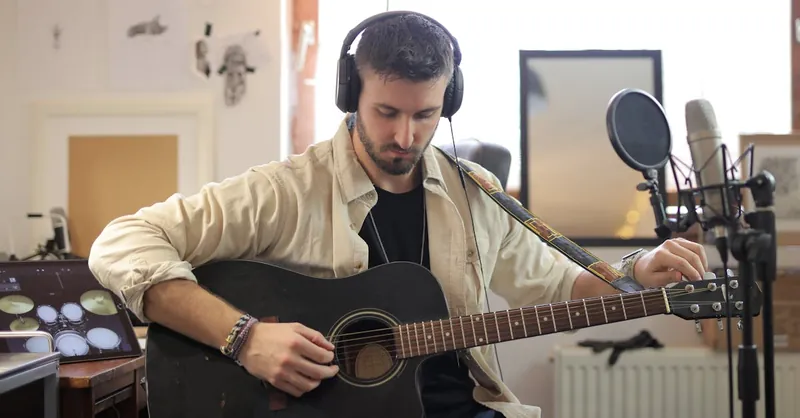
Image courtesy of Andrea Piacquadio
Direct Input vs. Amp Miking: Pros and Cons of Capturing Guitar Tones
When it comes to recording electric guitar at home, choosing between direct input (DI) recording and miking an amp cabinet is a crucial decision that shapes your tone and workflow. Each approach offers unique advantages and challenges, and understanding them will help you capture your ideal guitar sound efficiently.
Direct Input (DI) Recording and Re-Amping
Recording your guitar directly through a DI box or your audio interface’s Hi-Z input means plugging your guitar straight into your recording system without an amp or microphone. This method captures a clean, uncolored guitar signal, giving you ultimate flexibility in post-production.
Pros of DI recording:
- Versatility: Easily apply amp simulations, cabinet impulses, and effects later in your DAW to experiment with countless tones.
- No noise or room bleed: DI signals are clean and free from ambient noise or room reflections, ideal for untreated spaces.
- Simplified setup: Requires fewer pieces of gear and less time to connect, great for quick tracking or tight spaces.
- Re-amping options: Record the dry tone once, then send the signal back out to different amps or pedals later, optimizing your tone after tracking.
Cons of DI recording:
- The raw DI sound lacks the natural warmth and character of a real amp, often requiring high-quality amp simulators or re-amping to achieve a convincing tone.
- Might feel less inspiring to play through headphones without an amp’s physical response or feedback.
Amp Miking: Capturing Amp Cabinet Tone
Mic’ing a guitar amp cabinet captures the authentic sound produced by your tube or solid-state amp, including the speaker’s tonal coloration, amplifier dynamics, and room acoustics.
Pros of amp miking:
- Authentic tone: Captures the true amp sound with natural warmth, distortion, and dynamics.
- Expressive feel: Playing in front of an amp and hearing the interaction often leads to more emotive performances.
- Immediate character: The recorded tone requires less intensive processing compared to DI, making it suitable for producers aiming for realism.
Cons of amp miking:
- Sensitive to room acoustics, background noise, and mic placement—untreated rooms can introduce unwanted reflections and reduce clarity.
- Requires microphones, stands, and cables, increasing setup complexity and cost.
- Less flexible once recorded; tone adjustments require re-recording or complex multitrack routing.
Workflow Tips for Combining DI and Amp Miking
Many guitarists combine DI and amp miking to get the best of both worlds. Here’s an effective workflow:
- Record DI and amp tracks simultaneously: Using a splitter or audio interface with multiple inputs, capture a clean DI signal alongside your miked amp tone.
- Blend signals during mixing: Layering DI and amp tracks lets you blend the clarity of DI with the warmth of the amp to craft a unique hybrid tone.
- Utilize re-amping: Save the DI signal to try different amp models or cabinet simulations later, preserving your original performance while experimenting with tone.
This dual approach enhances flexibility and control, especially in home studios with limited acoustic treatment, allowing you to dial in your guitar tone perfectly at mixdown without sacrificing the feel of a miked amp.
By weighing the pros and cons of DI versus amp miking, and incorporating smart workflows like simultaneous capture and re-amping, you can unlock superior guitar tones in your home recordings that are both authentic and versatile.
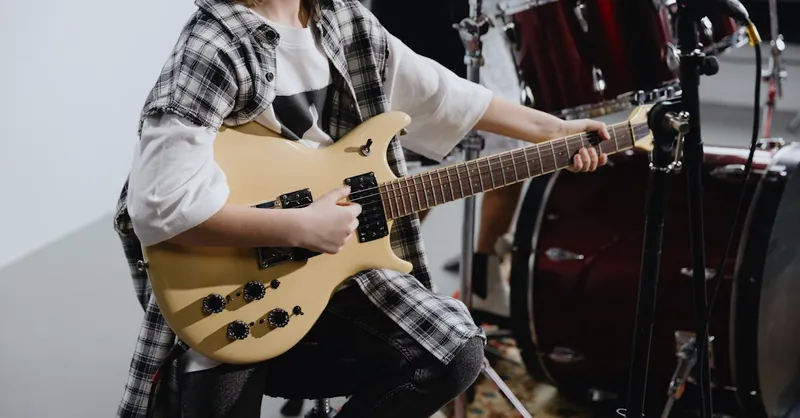
Image courtesy of cottonbro studio
Using Amp Simulators and Effects Plugins: Sculpt Your Guitar Tone Inside Your DAW
Harnessing the power of amp simulators and effects plugins within your DAW opens up an expansive palette of guitar tones, allowing home recording guitarists to craft professional, studio-quality sounds without relying on physical amps or pedals. Amp sims replicate the sonic characteristics of popular amplifiers and speaker cabinets digitally, providing authentic gain structures, EQ curves, and dynamics right at your fingertips. Paired with versatile distortion pedals, modulation effects (like chorus, phaser, and flanger), and time-based effects, you can shape every nuance of your guitar’s tone to suit your style and song.
Tips for Effective Integration of Amp Sims and Effects
- Choose Quality Amp Simulators: Start with reputable amp simulators such as Neural DSP, Positive Grid BIAS FX, or the built-in options in your DAW (e.g., Logic Pro X’s Amp Designer or Reaper’s ReaAmp). Quality sims deliver realistic tonal response and nuanced dynamics that respond to your playing intensity.
- Create a Signal Chain That Mirrors Real-World Setups: Arrange your plugins in a logical order to emulate how pedals interact with amps: typically, distortion or overdrive pedals go before the amp sim, while modulation and delay effects sit after the amp stage.
- Experiment with Cabinet Impulse Responses (IRs): Most amp sims support loading different speaker cabinet IRs, which significantly impact the final tone. Try various IRs to find the perfect combination of speaker characteristics and mic placement simulation.
- Use Automation for Dynamic Tone Shaping: Automate parameters such as gain, effect mix, or EQ settings throughout your track to reflect different playing sections or add interest dynamically.
- Monitor Latency: Amp sims and effect plugins can introduce latency; ensure you use low-latency monitoring modes in your DAW to keep your playing feel tight and responsive.
Benefits of Using Amp Sims and Plugins at Home
- Cost-effective: Avoid investing in multiple physical amps or pedals by accessing a vast library of tones digitally.
- Versatility: Quickly try different amplifier and effect combinations without rewiring gear, speeding up your creative process.
- Consistency: Reproduce your favorite tones anytime without worrying about mic placement or room acoustics.
- Easy Recall: Save presets and instantly recall your exact tone settings for future sessions or live performances.
By effectively incorporating amp simulators and effects plugins into your home recording workflow, you gain complete control over your guitar tone. This digital approach empowers guitarists to capture vibrant, dynamic sounds with minimal gear, driving creative exploration and professional results from your home studio.

Image courtesy of Tima Miroshnichenko
Recording Workflow and Signal Chain Best Practices
Establishing a solid recording workflow and maintaining an optimized signal chain are essential steps for guitarists aiming to achieve clean, dynamic, and professional-sounding home recordings. By carefully setting gain staging, managing latency, and organizing sessions efficiently, you minimize technical issues and keep your creative flow uninterrupted.
Step-by-Step Guide to Gain Staging
- Set Input Levels Before Recording: Ensure your guitar or amp signal reaches your audio interface without clipping or distortion by adjusting the gain knob. Aim for signal peaks around -12 dB to -6 dB on your DAW's input meter to maintain headroom.
- Avoid Overloading the Interface: Too hot a signal causes unwanted distortion and digital clipping that degrades tone. Conversely, very low input levels increase noise floor and reduce audio fidelity.
- Use Clean Preamp Settings: If your interface or preamp has tonal controls, initially keep them flat to capture a natural sound. Add EQ and effects later inside your DAW for more control.
- Monitor Signal Path: Confirm all cables, connectors, and software inputs are set correctly and free of hum or buzz before tracking.
Recording Multiple Takes for Best Results
Tracking multiple takes allows you to capture your best performance and comp together a flawless final guitar track:
- Always record several takes of each part, varying your playing dynamics or phrasing to capture nuanced options.
- Label each take clearly and keep them organized within your DAW using dedicated tracks or folders.
- Use punch-in recording to fix small mistakes without rerecording entire sections.
- Select the best phrases or combine sections with comping tools during editing for a polished final performance.
Managing Latency for Tight Timing
Latency—the delay between playing a note and hearing it through your monitoring system—can disrupt feel and timing. To reduce latency:
- Use direct monitoring on your audio interface when possible, which routes input signals straight to headphones or monitors with near-zero delay.
- Adjust your DAW’s buffer size, balancing lower buffer settings for reduced latency against potential CPU strain.
- Temporarily disable or bypass high-latency plugins like amp simulators or reverb when tracking guitar dry signals.
- Invest in a powerful computer and optimized drivers to minimize system-induced latency.
Organizing Your Sessions for Efficiency
Clear organization ensures smooth recording sessions and easier mixing down the line:
- Name tracks clearly (e.g., "Electric Guitar Rhythm 1," "Acoustic Guitar Lead") and color-code them.
- Use track folders or groups to keep multiple guitar layers tidy.
- Regularly save session backups and incremental versions to avoid data loss.
- Keep audio files and project data in designated folders with consistent naming conventions to streamline workflow across different projects.
By maintaining an optimized recording workflow and carefully managing your signal chain, you protect your guitar tone from unwanted noise and distortion, enhance performance capture, and speed up both tracking and mixing. Following these best practices will empower you to record confident, vibrant guitar tracks that stand out in any home studio production.
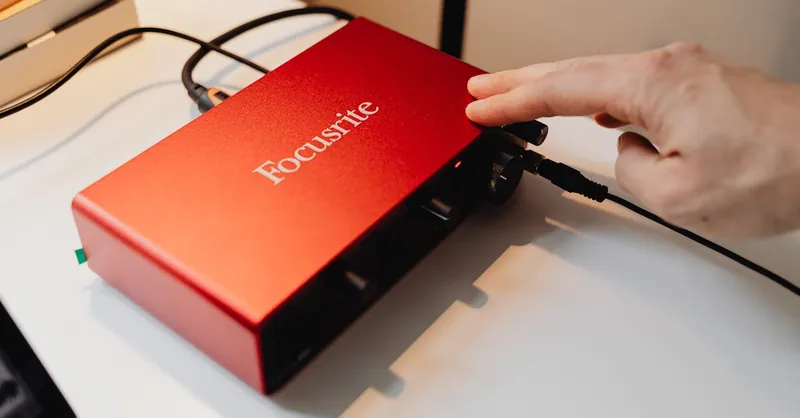
Image courtesy of Photo By: Kaboompics.com
Editing and Mixing Guitar Tracks at Home: Techniques for a Polished Sound
Once you’ve captured your guitar performances, the next critical phase is editing and mixing guitar tracks to transform raw recordings into balanced, engaging parts of your songs. Effective mixing involves comping takes, applying EQ, compression, reverb, and panning — all tailored to enhance the unique tonal qualities of your guitar while fitting it cohesively into the full mix.
Comping Guitar Takes for Flawless Performances
Comping is the process of selecting the best segments from multiple takes and combining them into a seamless, polished final track. When comping guitar parts at home:
- Record multiple takes to have various phrasing and dynamic options.
- Use your DAW’s comping tools to easily slice and arrange the best riffs, licks, and articulations.
- Pay special attention to timing consistency and smooth transitions between edits to maintain natural musical flow.
- Don’t hesitate to keep slight imperfections if they add feel — over-editing can render a sterile performance.
Essential EQ Tips to Shape Your Guitar Tone
Equalization is key to carving out your guitar’s sonic space and emphasizing its character:
- Cut unwanted frequencies such as muddiness around 200-400 Hz or harshness in the upper mids around 3-5 kHz.
- Boost presence by gently enhancing the 1-3 kHz range to bring your guitar forward.
- Use a high-pass filter to remove unnecessary low-end rumble under 80 Hz, especially for electric guitars.
- For acoustic guitars, emphasize the 80-250 Hz range for warmth and 5-8 kHz for brightness and string definition.
Compression Techniques for Dynamic Control
Compression helps even out guitar dynamics and maintain consistency throughout your track:
- Use moderate ratio settings (3:1 to 5:1) with a medium attack and release to preserve transient detail.
- Apply subtle compression to tame peaks in aggressive strumming or fingerpicking without squashing natural dynamics.
- For rhythm guitar tracks, slightly more compression can add sustain and presence.
- Consider parallel compression by blending a heavily compressed signal with the dry track to retain punch and clarity.
Reverb and Effects: Adding Depth and Space
Appropriate use of reverb enriches guitar tracks by placing them within a sense of space:
- Choose shorter reverb times for tight electric guitar parts to avoid washing out the articulation.
- Longer, lush reverbs suit clean or acoustic guitar tracks where ambience enhances musicality.
- Experiment with plate, hall, or room reverbs depending on the style and feel you’re aiming for.
- Delay effects can add rhythmic complexity, but use sparingly to keep the mix clean.
Panning Strategies for a Wide Guitar Mix
Effective panning creates stereo width and separation in your guitar mixes:
- For rhythm guitars, pan complementary parts left and right to build a thick stereo foundation.
- Lead guitars and solos typically sit near the center to maintain focus.
- Layered guitar harmonies can be panned at varying degrees to add dimension.
- Avoid hard panning acoustic guitars too far, as it can sound unnatural.
By combining these editing and mixing techniques—careful comping, precise EQ, tasteful compression, ambient reverb, and strategic panning—you can sculpt clean, dynamic, and professional guitar tracks from home recordings. Mastering this stage ensures your guitar performances are not only sonically compelling but also perfectly balanced to sit comfortably within your full band or solo production.
Image courtesy of Anna Pou
Troubleshooting Common Issues: Solutions for Noise, Latency, Clipping, and Monitoring Challenges
Even with the best gear and techniques, home recording guitarists often face technical hurdles that impede smooth sessions and degrade sound quality. Successfully troubleshooting common recording issues like noise, latency, clipping, and monitoring problems is essential to maintaining clean, professional guitar tracks and staying in the creative flow.
Tackling Noise and Hum in Your Guitar Recordings
Unwanted noise and hum can originate from various sources including poor cable shielding, electrical interference, or grounding issues. To minimize noise:
- Use high-quality, shielded cables and avoid running instrument cables parallel to power cords.
- Check grounding by ensuring all your gear shares the same power outlet or use a ground lift adapter carefully.
- Keep gain levels optimized—too high an input gain amplifies the noise floor, while low levels can reduce signal clarity.
- When using pedals or amp sims, ensure your power supply is isolated and free from digital interference.
- Employ noise gates and noise reduction plugins subtly during mixing to clean residual hum without dulling your tone.
Managing Latency for Responsive Playing
Latency—the audible delay between playing your guitar and hearing the sound—can severely disrupt timing and feel. To keep latency under control:
- Engage direct monitoring on your audio interface to bypass DAW processing latency.
- Lower your DAW’s buffer size during tracking sessions without overloading your CPU.
- Temporarily disable or bypass latency-heavy plugins like reverb or amp sims while recording your dry guitar tracks.
- Update your audio interface drivers and use ASIO or Core Audio (Mac) drivers for optimal performance.
Preventing Clipping and Digital Distortion
Clipping occurs when the input signal exceeds your audio interface’s maximum level, causing harsh digital distortion. Avoid clipping by:
- Setting proper gain staging: aim for peaks between -12 dB and -6 dB on your input meters.
- Watching out for overly hot pedal or amp sim settings that push the signal into distortion unintentionally.
- Using meters and peak indicators in your DAW to visually monitor signal levels in real time.
- Employing limiting plugins cautiously during mixing to tame unexpected peaks without degrading dynamics.
Overcoming Monitoring Challenges for Precise Tracking
Accurate and comfortable monitoring is crucial for tight guitar performances and confident takes:
- Use closed-back headphones during tracking to isolate your guitar sound and prevent bleed into mics.
- Set a balanced monitoring mix that blends your dry guitar signal with backing tracks, so you can play in time and in tune.
- Calibrate your studio monitors or headphones for consistent tonal response; this helps you make better tonal and mix decisions.
- Consider investing in a dedicated monitor controller or headphone amplifier to manage levels efficiently and avoid speaker damage.
By proactively addressing these core challenges—noise reduction, latency management, clipping prevention, and monitoring setup—guitarists can streamline their home recording process. The result is cleaner tracks, enhanced playing confidence, and faster progress toward high-quality, studio-ready guitar recordings from the comfort of home.
Image courtesy of Pixabay
Expanding Your Setup Over Time: Strategic Upgrades and Essential Additions
As your recording skills and creative ambitions grow, gradually expanding your home studio gear can significantly enhance the quality and versatility of your guitar recordings. Starting with a solid foundation is great, but thoughtful upgrades like adding quality microphones, preamps, and controller hardware help unlock new sonic possibilities and streamline your workflow.
Upgrading Microphones for Greater Sonic Depth
While entry-level dynamic or condenser microphones are sufficient initially, investing in higher-end or specialized microphones brings richer detail and nuance to your recordings:
- Large-diaphragm condenser mics add warmth and clarity for acoustic guitars and vocals.
- Ribbon microphones provide smooth high-frequency response and natural harmonic tones, ideal for capturing amp cabinets with vintage character.
- Using multiple mic types together (e.g., dynamic plus condenser or ribbon) enables complex tonal layering that professional studios rely on.
Adding External Preamps for Improved Signal Quality
Upgrading from your audio interface’s built-in preamps to dedicated external preamps can deliver cleaner gain, lower noise floor, and distinctive tonal coloration. Consider:
- Tube preamps, which add warmth and smooth harmonic saturation.
- Solid-state preamps, known for transparent, detailed amplification.
- Budget-friendly boutique units that elevate your guitar’s presence and dynamics before digitization.
External preamps also provide more headroom and control over input gain staging, crucial for capturing dynamic guitar performances without distortion.
Incorporating MIDI Controllers and Hardware for Efficiency
As your production becomes more complex, integrating MIDI controllers and hardware control surfaces helps you manage virtual amps, effects racks, and mixing parameters hands-on. Benefits include:
- Streamlined navigation and faster tweaking of amp simulator parameters.
- Enhanced tactile expression for effects automation and real-time sound design.
- Customizable pads and knobs for triggering loops, samples, or effect switches.
Controllers tailored for guitarists, such as MIDI foot controllers, allow seamless switching between presets and effects during recording or live performance, making the creative process more intuitive.
By progressively enhancing your home recording setup with targeted gear additions like premium microphones, quality preamps, and MIDI controllers, you not only improve sound fidelity but also boost creative flexibility and workflow efficiency. Prioritize upgrades that match your evolving musical goals and recording style to continue capturing remarkable guitar tones from your home studio.

Image courtesy of Tima Miroshnichenko
Exporting and Sharing Your Tracks: Finalizing Mixes, Mastering Basics, and Preparing Audio for Streaming, Collaboration, or Demos
After recording, editing, and mixing your guitar tracks to perfection, the next critical step is exporting and sharing your music in a way that preserves its quality and maximizes its impact across platforms. Understanding how to properly finalize your mixes, apply basic mastering techniques, and prepare audio files for various uses—like streaming services, online collaboration, or demo submissions—is essential for any guitarist serious about home recording.
Finalizing Your Mix for Export
Before exporting your mix, ensure you:
- Check Your Mix Levels: Maintain adequate headroom by keeping the master output peaks around -6 dB to -3 dB to avoid clipping during export.
- Apply a Gentle Limiter: Use a transparent limiter on your master bus to prevent sudden peaks from causing distortion without squashing dynamics.
- Confirm Phase and Mono Compatibility: Double-check that your guitar tracks and full mix don’t suffer from phase cancellation, which can weaken your sound on mono or smaller playback systems.
- Listen on Multiple Devices: Test your mix on headphones, studio monitors, and consumer devices (smartphones, laptops) to ensure your guitar tone translates well in different listening environments.
Mastering Basics for Guitar Tracks
Mastering is the final polish that optimizes your track’s loudness, balance, and clarity for distribution. While professional mastering engineers deliver the best results, you can apply essential mastering steps at home:
- Equalization (EQ): Make subtle adjustments to overall tonal balance—brighten dullness or tame overly harsh frequencies.
- Compression: Apply gentle multiband or broadband compression to glue the mix together and add sustain without smothering dynamics.
- Limiting: Increase perceived loudness by carefully pushing the output ceiling without causing distortion or clipping.
- Stereo Imaging: Use widening tools sparingly to enhance stereo width, helping guitar tracks sound fuller and more immersive.
Keep your mastering subtle; the goal is to enhance the mix’s existing strengths, not to overhaul it completely.
Preparing Audio for Streaming, Collaboration, and Demos
How you export and format your final audio files depends on its intended use:
- Streaming Platforms (Spotify, Apple Music, YouTube): Export your mastered track as a 16-bit/44.1kHz WAV or AIFF file for the highest quality upload. Avoid overly aggressive limiting to ensure optimal playback across compressed streaming codecs.
- Online Collaboration: Share lossless formats like WAV or FLAC files for maximum fidelity or high-bitrate MP3s (320 kbps) if file size is a concern. Include stems or individual guitar tracks when possible to allow collaborators flexibility.
- Demo Submissions: Submit your best-sounding mixed and mastered stereo track in WAV format. Ensure the track is tagged with metadata (artist name, song title) for professional presentation.
By mastering the art of finalizing your mixes, applying basic mastering techniques, and exporting your guitar tracks in the appropriate formats, you ensure your music sounds compelling wherever it’s heard. Proper preparation increases your chances of making a strong impression—whether streaming worldwide, collaborating with other musicians online, or landing your next gig with a demo that truly captures your guitar’s unique voice.
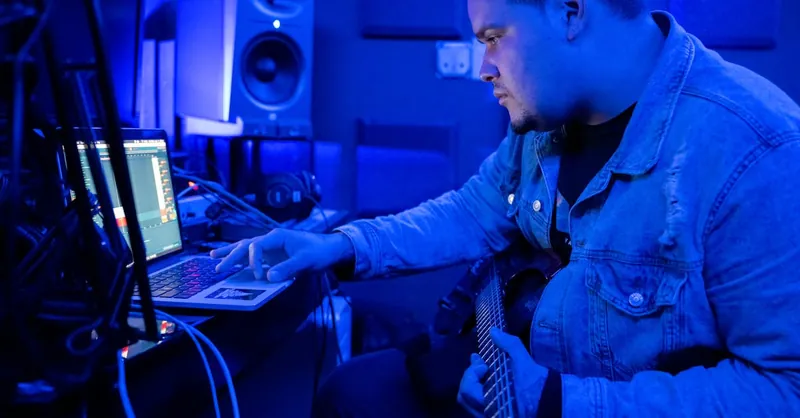
Image courtesy of Brett Sayles