Master Guitar Tone Shaping with Pedals: A Complete Guide
Category: Guitar Gear
Unlock Your Ultimate Guitar Tone with Pedal Mastery
For any guitar player, dialing in the perfect tone can be the difference between a run-of-the-mill sound and a signature voice that commands the room. Whether you're a passionate beginner exploring effects pedals for the first time or a seasoned musician craving to refine and expand your sonic palette, understanding guitar tone shaping with pedals is essential. You've likely scoured forums, watched countless demos, and maybe even bought a few pedals that didn’t quite deliver the magic you sought. This guide offers a fresh, comprehensive approach—breaking down the key concepts, pedal types, placement techniques, and sound-shaping strategies tailored for guitarists at all levels.
Here, you'll not only learn how to make your pedals interact seamlessly but also discover practical insights into gear selection, combining effects for diverse styles, and optimizing your production setup. This post cuts through the technical jargon and piles of conflicting advice to provide clear, actionable knowledge that empowers you to create your distinct guitar tone. Get ready to turn your pedalboard into a dynamic toolbox that brings your musical ideas vividly to life.
- Unlock Your Ultimate Guitar Tone with Pedal Mastery
- Understanding Guitar Tone Fundamentals
- Overview of Common Guitar Effect Pedals
- How Pedal Order Shapes Your Tone
- Advanced Tone Shaping Techniques with Pedals
- Choosing the Right Pedals for Your Style and Genre
- Building and Organizing Your Pedalboard: Essential Tips for Layout, Power, Cable Management, and Portability
- Integrating Pedals with Amplifiers and Recording Gear
- Common Mistakes and How to Avoid Them
- Creative Sound Design and Experimental Applications
- Maintaining and Upgrading Your Pedal Setup: Keeping Your Tone Fresh and Evolving
Understanding Guitar Tone Fundamentals
Crafting your ideal guitar tone begins with a solid grasp of the fundamental elements that shape your sound before it even touches an effects pedal. Three critical components interact to define your base tone: the pickup types, the amplifier, and the signal chain, including how pedals modify your guitar's voice.
Pickup Types: The First Sonic Signature
Your guitar’s pickups have a huge impact on tonal character. The two main categories to understand are:
- Single-Coil Pickups: Known for their bright, crisp, and articulate sound, single-coils excel in genres like blues, country, and funk. However, they can be prone to electrical hum.
- Humbucker Pickups: Designed to “buck” the hum, humbuckers deliver a thicker, warmer tone with higher output, favored in rock and metal. Their fuller sound creates an excellent foundation for distortion and overdrive pedals.
Choosing pickups tailored to your style ensures the pedals you add will interact with the natural tonal properties effectively, rather than working against the inherent sound.
The Amplifier’s Role in Tone Shaping
Your amplifier is more than just a volume booster—it acts as a crucial tone sculptor. Tube amps, solid-state amps, and modeling amps all color your signal differently:
- Tube Amplifiers: Provide natural compression and harmonic richness, responding dynamically to your playing. They complement pedals that thrive on input sensitivity, such as overdrives and fuzzes.
- Solid-State Amplifiers: Known for clean, transparent tones, they offer a consistent, noise-free platform ideal for modulation and delay effects.
- Modeling Amplifiers: Versatile in emulating various amp tones, they allow experimentation via built-in effects and presets, serving as an additional layer of tone shaping.
Understanding your amp’s characteristics helps you position pedals in the signal chain to either drive the amp harder or process its output effectively.
How Pedals Influence Your Signal Chain
Effects pedals don't just add sounds—they shape the dynamics, frequency response, and texture of your guitar tone by modifying the electrical signal between your guitar and amp. Key ways pedals affect your tone include:
1. Gain and Saturation: Overdrive, distortion, and fuzz pedals alter the amplitude and harmonic content, changing the character from subtle grit to aggressive saturation.
2. Frequency Shaping: EQ and filter pedals help sculpt the tonal balance, allowing boosts or cuts in bass, mids, and treble frequencies.
3. Modulation and Time-Based Effects: Chorus, delay, reverb, and phaser pedals add movement, space, and depth, expanding your sonic landscape beyond the raw guitar signal.
The position of these pedals relative to your guitar and amp input or effects loop dramatically influences their effectiveness—a topic we’ll explore in depth later.
By mastering these core tone fundamentals—pickup selection, amplifier interaction, and signal chain dynamics—you build a stable, inspiring foundation for pedal experimentation. This knowledge transforms your approach from guesswork to intentional sound crafting, unlocking a vast palette for your ultimate guitar tone.
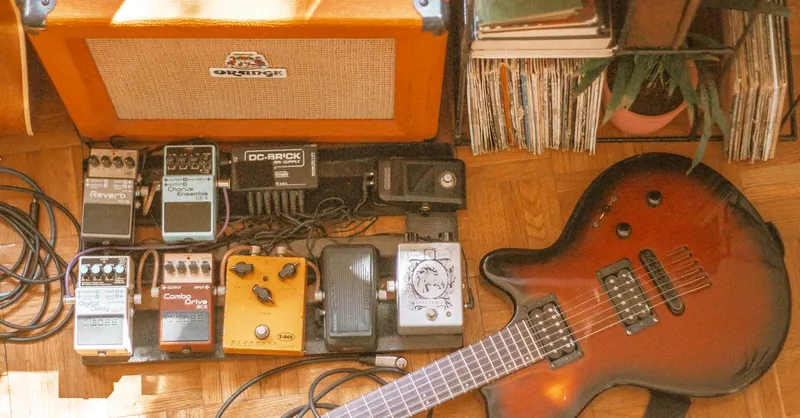
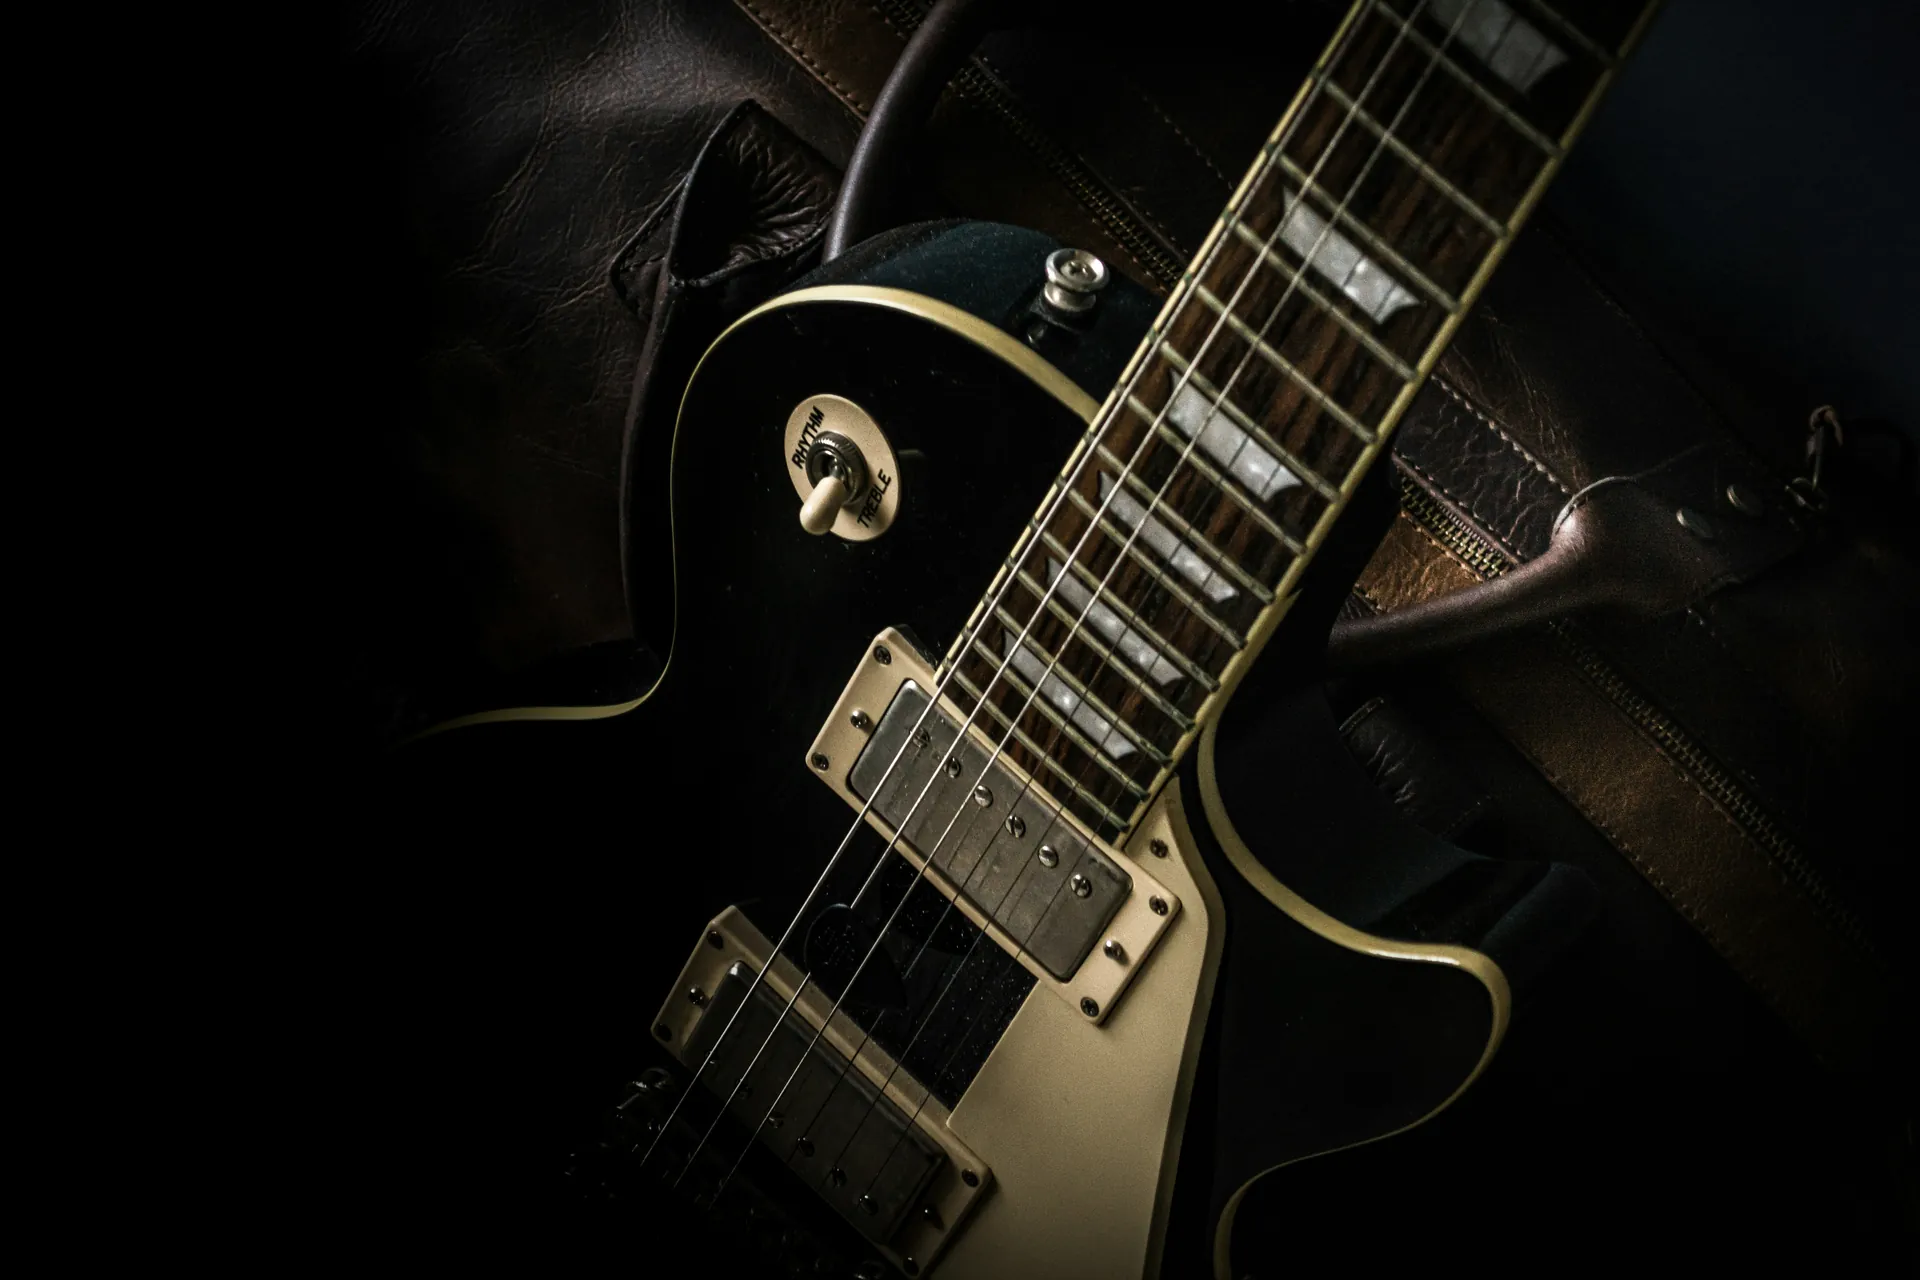
Image courtesy of Alina Vilchenko
Overview of Common Guitar Effect Pedals
To truly master guitar tone shaping, understanding the core categories of effects pedals is essential. Each type contributes distinct sonic characteristics and dynamic textures that can profoundly transform your playing style and musical expression. Below is an overview of the most common pedal categories, their tonal contributions, and key usage tips to help you integrate them effectively into your signal chain.
Distortion and Overdrive Pedals
These pedals are the backbone for adding gain and harmonic saturation to your tone, pushing your amplifier into natural or enhanced breakup.
- Distortion pedals produce a more aggressive, compressed sound, ideal for heavy rock, metal, and any style requiring thick, sustained saturation.
- Overdrive pedals simulate the warm, gradual breakup of a tube amp driven just beyond its clean range, widely favored in blues, classic rock, and country. They excel at preserving the dynamics and clarity of your playing.
Usage tip: Place these pedals early in your chain to interact directly with your pickups and amp input for maximum responsiveness.
Modulation Effects
This group includes pedals like chorus, phaser, flanger, and tremolo, which add movement and texture by continuously varying certain aspects of your guitar signal.
- Chorus thickens and broadens the sound by duplicating and slightly detuning the original signal.
- Phaser and flanger create sweeping, swirling tones through phase cancellation techniques.
- Tremolo modulates signal amplitude for rhythmic pulsation.
Usage tip: Experiment with placing modulation pedals after gain effects but before time-based effects to maintain clarity and presence.
Delay Pedals
Delay pedals replicate your guitar signal and replay it after a short interval, creating echoes and repeating patterns. From subtle slap-back echoes to infinitely looping ambient textures, delay pedals add depth and spatial complexity.
Usage tip: Use shorter delay times for rhythmic tightness or longer delays for atmospheric effects. Position delay pedals typically after modulation for a natural spatial effect.
Reverb Pedals
Reverb simulates the acoustic reflections experienced in different environments, from small rooms to vast cathedrals. It adds ambience and dimension, making your sound feel lively and three-dimensional.
Usage tip: Place reverb near the end of your effects chain so it processes the fully shaped tone to preserve the natural sense of space.
Compression Pedals
Compression evens out your playing dynamics by reducing the volume of loud signals and boosting quieter ones. This leads to a more consistent tone, improved sustain, and enhanced note articulation, especially when playing clean or fingerstyle.
Usage tip: Insert compressors early in the chain, frequently right after the guitar, to optimize signal consistency before further processing.
EQ Pedals
Equalizer pedals provide precise control over your tone’s frequency spectrum by allowing you to boost or cut bass, midrange, and treble bands. They are invaluable for compensating for tone deficiencies in your rig or tailoring your sound for specific songs and venues.
Usage tip: Use EQ pedals both as tonal correction tools and creative sound shapers, positioning them either before distortion pedals for tonal coloration or after all effects to fine-tune the final output.
By familiarizing yourself with these fundamental pedal types and their tonal roles, you can make informed choices tailored to your playing style and sonic goals. Combining these effects strategically unlocks a vast universe of guitar tones—from raw and punchy to ethereal and expansive—empowering you to craft a truly unique voice on your instrument.
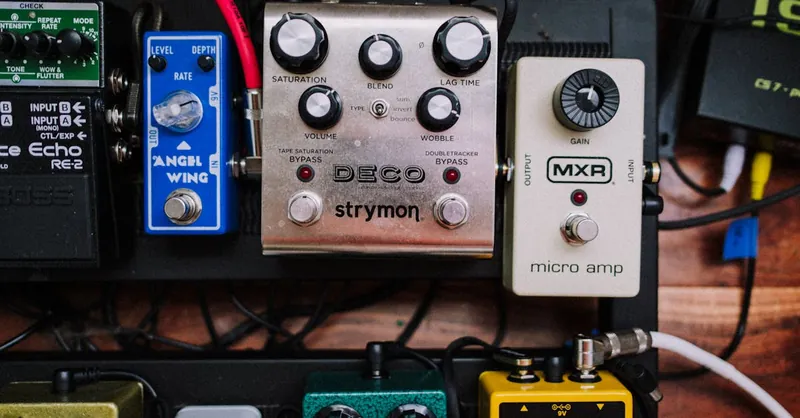
Image courtesy of Kelly
How Pedal Order Shapes Your Tone
The order in which you arrange your pedals within the signal chain is a pivotal factor in defining your overall guitar tone. While every player’s setup is unique, certain standard configurations have become foundational because they optimize how each effect interacts with the signal. Understanding these principles empowers you to experiment confidently and tailor your sound with precision.
Impact of Pedal Placement in the Signal Chain
Pedal order influences not only the clarity and character of each effect but also how they combine and respond dynamically. For example:
-
Gain-Based Effects First: Placing distortion, overdrive, and fuzz pedals at the beginning of the chain allows them to interact directly with your guitar’s raw signal and pickups. This placement preserves the pedals’ touch sensitivity and harmonic richness, creating organic saturation.
-
Dynamic and EQ Pedals Early: Compressors and equalizers typically come next to shape and stabilize the signal before modulation or ambient effects. Compressors smooth out volume fluctuations, while EQs can fine-tune tonal balance or accentuate frequencies that drive subsequent pedals more effectively.
-
Modulation Effects Mid-Chain: Chorus, flanger, phaser, and tremolo pedals generally sound best placed after overdrive and EQ, so they apply movement and texture to a more harmonically rich, yet balanced signal.
-
Time-Based Effects Last: Delay and reverb pedals are almost always positioned at the end of the chain to provide spaciousness and depth without muddying the initial tone. If placed earlier, these effects can be distorted or overwhelmed by gain pedals that follow, losing their natural ambience.
Standard Pedal Chain Example
A widely used signal chain setup looks like this:
Guitar → Compressor → Overdrive/Distortion/Fuzz → EQ → Modulation (Chorus, Phaser) → Delay → Reverb → Amplifier
Practical Examples to Experiment With
- Boosting Solo Volume: Position a clean boost or boost pedal immediately before the amp input or at the start of the chain to push your amp harder for solos without adding unwanted noise.
- Using Delay in Front of Distortion: Although unconventional, placing delay before distortion can create aggressive, rhythmic echo effects but may lose clarity; use this creatively for unique textures.
- Inverting Modulation and Delay: Switching the order of modulation and delay pedals can alter how delays repeat modulated signals, resulting in subtle to dramatic changes in ambience and movement.
By consciously experimenting with your pedal order while keeping these guidelines in mind, you gain fine control over your tone’s responsiveness, clarity, and dimensionality. Mastering pedal placement is crucial for crafting a professional, versatile sound that elevates your playing across genres and environments.

Image courtesy of Kelly
Advanced Tone Shaping Techniques with Pedals
Once you've mastered the basics of pedal types and signal chain order, it's time to explore advanced tone shaping techniques that elevate your sound beyond conventional setups. These methods give you greater control, versatility, and dynamic expression, allowing your pedalboard to become a powerful extension of your musical voice.
Stacking Overdrives for Richer Gain Textures
Stacking overdrive pedals involves placing two or more overdrive or distortion pedals in sequence to create complex, layered gain tones. This technique can simulate amplifier breakup more organically or push your amp into heavier saturation with nuanced control over each gain stage.
- Light Drive into Heavier Gain: Start with a mild overdrive pedal to add warmth and touch sensitivity, then follow with a higher-gain distortion for thickness and sustain.
- Different Voicings for Depth: Combine overdrives with complementary EQ curves (e.g., one cutting mids, another boosting highs) to craft a more dynamic, harmonically rich tone.
- Volume and Gain Balancing: Adjust volumes carefully so pedals interact smoothly without unwanted noise or drastic spikes, preserving clarity and articulation.
Parallel Effects Routing for Signal Blending
Parallel routing splits your guitar signal into two or more paths, each processed by different pedals before recombining them. This method preserves the clarity and punch of your dry signal while integrating lush effects or heavy processing.
- Use a ABY splitter or a dedicated pedal looper with parallel outputs to maintain optimal signal integrity.
- Blend a clean tone with a heavily effected one (like distorted and delay-heavy) to retain note definition while adding atmospheric layers.
- Experiment by sending modulation effects (chorus or tremolo) on a parallel path to keep the core tone prominent but textured.
Buffers vs. True Bypass: Maintaining Signal Integrity
Understanding the difference between buffered pedals and true bypass pedals is critical for preserving your tone, especially if you use many pedals or long cable runs.
- True Bypass Pedals route your signal directly when off, ensuring no tone coloration but risking high-frequency loss over long cables or large pedalboards.
- Buffered Pedals actively maintain signal strength and impedance, preventing tone degradation but potentially altering your sound if used excessively or in the wrong order.
- A common approach is to place a good quality buffer pedal early in your chain or integrated into your amp input and then use true bypass pedals where tone purity is paramount.
- Many modern pedalboards combine both types strategically for optimal balance between tone preservation and flexibility.
Integrating Expression Pedals for Dynamic Control
Adding an expression pedal to your setup introduces real-time, hands-on control of effect parameters, expanding your expressive capabilities dramatically.
- Control parameters such as delay time, modulation depth, wah frequency, or volume swells dynamically during performances.
- Most expression pedals connect via TRS cables to compatible pedals; check your pedal’s manual to assign and program parameters effectively.
- Combining expression pedals with multi-effect units or programmable loops can enable complex effect morphing, enabling you to sculpt evolving textures and respond fluidly to your playing intensity.
By mastering these advanced techniques—stacking overdrives, parallel routing, optimal use of buffers and true bypass, and leveraging expression pedals—you unlock a highly customizable tonal landscape. These strategies enhance your pedalboard’s versatility and empower you to craft signature sounds with greater nuance, responsiveness, and depth, setting your guitar tone apart in any musical context.
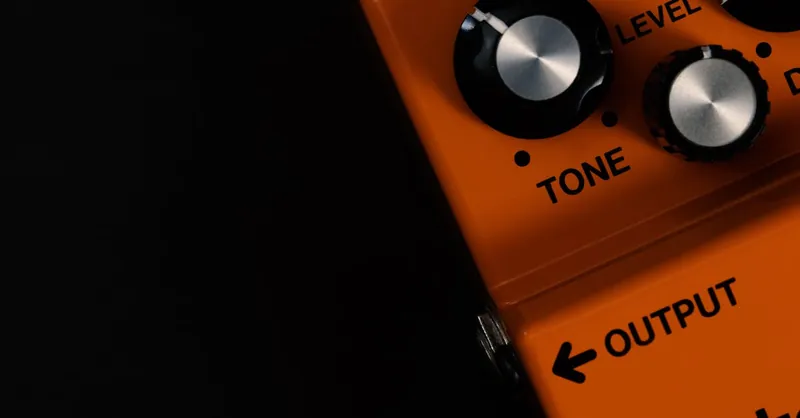
Image courtesy of E
Choosing the Right Pedals for Your Style and Genre
Selecting the perfect pedals to complement your unique playing style and genre is a critical step in achieving a distinctive guitar tone. Different musical styles demand specific tonal characteristics and effects, and tailoring your pedalboard accordingly ensures your sound feels authentic and expressive. Below, we explore guidance for choosing pedals that best fit blues, rock, metal, jazz, and ambient music, helping you match your pedal selection to your artistic approach.
Pedals for Blues Guitarists
Blues players typically seek warm, dynamic overdrive that responds well to touch and picking nuances. Ideal pedals include:
- Overdrive pedals with smooth breakup and midrange focus to emulate natural tube amp saturation (e.g., Ibanez Tube Screamer style).
- Compressor pedals to enhance sustain and note clarity without sacrificing warmth.
- Subtle delay or reverb units for adding space while preserving organic feel.
These effects capture the emotive, vocal-like qualities central to blues tone.
Pedals for Rock Players
Rock guitarists benefit from versatile gain pedals and modulation to cover everything from crunchy rhythms to soaring leads:
- Overdrive and distortion pedals that offer a broad gain range with punchy attack and harmonic richness.
- Boost pedals for solo volume lift and amp-driven saturation.
- Modulation effects such as chorus and phaser to add movement and thickness in choruses or verses.
- Balanced use of delay and reverb to create depth without washing out aggressive tones.
Pedals for Metal Guitarists
Metal demands high-gain saturation and precision with tight low-end and cutting mids:
- High-gain distortion or fuzz pedals designed for aggressive, saturated tones with clear note definition.
- Noise gates to eliminate unwanted hiss and feedback during high-gain playing.
- EQ pedals for sculpting scooped or mid-focused frequencies commonly needed in various metal subgenres.
- Minimal modulation but often tight, articulate delay effects for lead play and atmospheric builds.
Pedals for Jazz Guitarists
Jazz tone prioritizes clean, warm, and articulate sounds that highlight complex chord voicings:
- Transparent compression pedals to even out dynamics and enhance note sustain.
- Mild overdrive or boost pedals for slight warmth without coloration.
- Tasteful use of delay and reverb to add subtle ambiance and space while retaining natural tone.
- Optional octave or volume pedals for nuanced dynamic control and expression.
Pedals for Ambient and Experimental Styles
Ambient players rely heavily on texture and spatial effects to craft expansive sonic landscapes:
- Delay pedals with long, lush repeats and looping capabilities for layering soundscapes.
- Reverb pedals featuring diverse algorithms from hall to shimmer for ethereal depth.
- Rich modulation effects like chorus, phaser, and flanger with slow, evolving parameters.
- Looper pedals to build complex, layered phrases and dynamic performance textures.
By aligning your pedal choices to these genre-specific tonal traits, you not only enhance your musical expression but also ensure your pedalboard configuration works synergistically with your technique, guitar, and amplifier. This thoughtful customization transforms your setup into a finely tuned instrument tailored to your sound identity and performance needs.
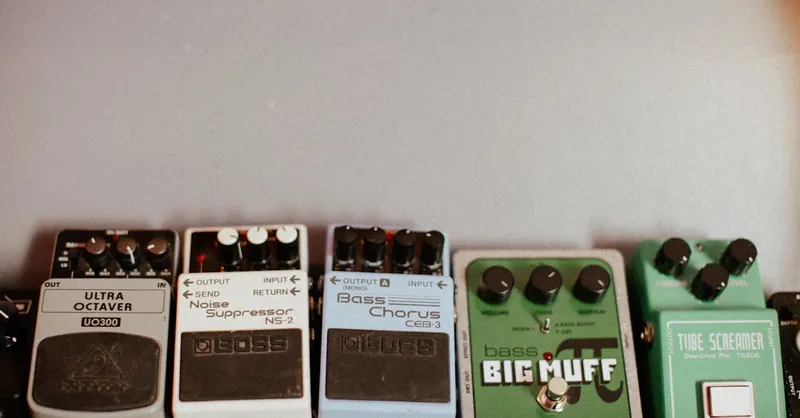
Image courtesy of Kelly
Building and Organizing Your Pedalboard: Essential Tips for Layout, Power, Cable Management, and Portability
Creating a well-organized pedalboard is key to unlocking consistent, professional-grade guitar tone whether you’re playing at home or gigging live. A thoughtfully designed pedalboard not only streamlines your signal chain but also enhances workflow, reduces noise issues, and safeguards your gear. Here are critical considerations to optimize your pedalboard layout, power supply, cable management, and transportability for maximum tonal reliability and convenience.
Pedalboard Layout: Strategic Placement for Efficiency and Sound Quality
When arranging pedals on your board, focus on signal flow clarity, ease of access, and physical stability. Start by grouping pedals based on their role in the signal chain—gain pedals (overdrive, distortion) at one end, modulation and time-based effects at the other—and leave space for expression or boost pedals that you’ll want to reach quickly during performances. Consider these tips:
- Use Velcro strips or pedalboard tape for secure yet flexible pedal mounting that allows easy removal or repositioning.
- Angle pedals slightly to improve foot access and visibility of settings in low-light gig environments.
- Keep power adapters and patch cables organized beneath or alongside the board to reduce clutter and accidental disconnects.
- Reserve space for future pedal additions or switching pedals in and out depending on setlists or styles.
A disciplined layout also minimizes cable length between pedals, which reduces tone-degrading capacitance and keeps your sound crisp and defined.
Power Supply Considerations: Reliable and Noise-Free Pedal Power
Using a dedicated pedalboard power supply with isolated outputs is one of the most impactful investments you can make. Avoid daisy-chaining power adapters, which can introduce hum and noise into your signal chain. Key power supply features to look for include:
- Isolated, regulated outputs to prevent ground loops and voltage drops.
- Compatibility with pedal voltage and current requirements, including standard 9V, 12V, or even 18V pedals.
- Compact size and low noise design for silent operation.
If playing gigs, a rugged power supply with integrated surge protection ensures stable performance and longevity for your pedals on the road or stage.
Cable Management: Maintaining Signal Integrity and Pedalboard Tidiness
Efficient cable routing and quality patch cables are essential for preserving your tone and preventing messy setups that waste time. Follow these best practices:
- Use short, low-capacitance patch cables between pedals to reduce high-frequency loss.
- Employ right-angle plugs where space is tight to prevent cable strain and accidental disconnections.
- Bundle cables underneath the board with reusable cable ties or Velcro wraps to keep them secure and out of sight.
- Regularly inspect and replace cables showing wear or damage to avoid crackling or signal dropouts.
Well-managed cables not only improve reliability but also contribute to a professional, polished pedalboard appearance.
Transportability: Making Your Pedalboard Gig-Ready and Home-Friendly
Whether lugging your pedalboard between rehearsals and gigs or maintaining a permanent setup at home, portability and protection are paramount. Consider the following:
- Choose a lightweight yet sturdy pedalboard frame made of aluminum or composite materials for durability without excessive weight.
- Use pedalboard bags, cases, or road-ready flight cases with foam padding to protect pedals during transport and setup.
- Label patch cables and power outputs if you rotate pedal configurations regularly to speed up troubleshooting and setup time.
- If you gig frequently, consider a modular pedalboard setup or pedal switching system that allows quick swaps or preset recall.
By investing in a pedalboard that balances rigidity, compactness, and protection, you ensure your effects stay in top shape and your tone is ready to perform, no matter the venue.
Integrating these pedalboard building and organization strategies empowers you to maintain clean, reliable signal paths, reduce setup headaches, and focus on your playing and tone creation. A streamlined, powered, and portable pedalboard is foundational for guitarists aiming to deliver consistent, expressive performances and achieve their unique sound with efficiency and confidence.
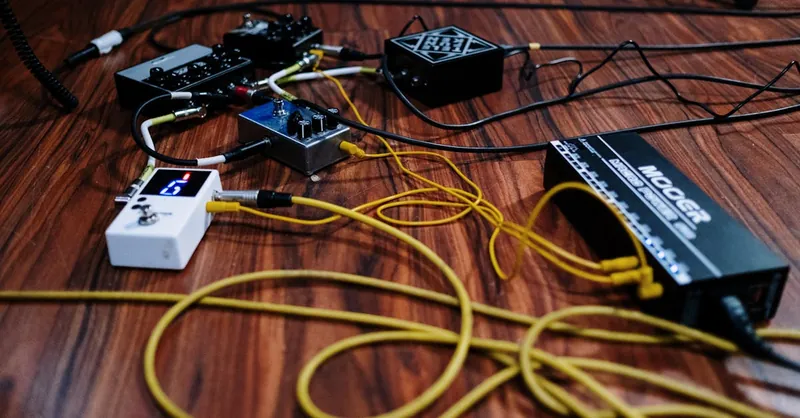
Image courtesy of cottonbro studio
Integrating Pedals with Amplifiers and Recording Gear
Achieving a polished and professional guitar tone goes beyond pedal selection and placement—it also requires a thoughtful approach to integrating your pedals with amplifiers and recording equipment. Whether you play through a vintage tube amp, a modern modeling head, or record directly into a digital audio workstation (DAW), proper connection methods ensure your effects enhance rather than hinder your sound.
Connecting Pedals to Different Types of Amplifiers
- Input vs. Effects Loop: Most guitar amplifiers offer two primary signal paths for pedals:
- Amp Input: Plugging pedals directly into the amp's front input means your effects interact with the amp’s preamp and tone controls. Overdrive and distortion pedals often sound more organic here because they drive the amp’s natural gain stage.
-
Effects Loop: Located in the amp’s signal chain path (usually post-preamp, pre-power amp), effects loops provide a dedicated send/return for modulation and time-based effects. Placing delay, reverb, and modulation pedals in the effects loop preserves clarity and prevents their signals from being distorted by the preamp stage.
-
Best Practices:
- Use the amp input for gain-based pedals like overdrives, distortions, and fuzzes to maximize dynamic response.
- Insert modulation, delay, and reverb pedals in the effects loop when available, especially if you use high-gain settings, to maintain effect clarity and spatial accuracy.
- For solid-state amps with no dedicated effects loop, position all pedals in front of the amp and adjust gain and tone settings carefully to avoid noise and muddiness.
Setting Up Pedals for Direct Recording and Music Production
Integrating pedals into your recording setup requires additional considerations to capture optimal tone and minimize noise:
- Direct Input (DI) with Pedals: When recording directly to an audio interface or amp sim, pedals must deliver a strong, clean signal compatible with the interface’s input impedance. Boost or buffer pedals can help maintain signal integrity.
- Using Amp Simulators and Multi-Effects: When employing amp modeling software, consider inserting pedals before the amp sim plugin to emulate authentic signal chains. Alternatively, recording a dry DI track alongside an effected track enables maximum flexibility in mixing.
- Reamping: Recording a clean DI track and routing it back through pedals and amps during mixing (reamping) allows experimentation with pedal placement and amplifier settings without committing to tone upfront.
- Noise Reduction: Employ noise gates and high-quality power supplies in your recording rig to reduce hum, hiss, and interference commonly introduced by pedals and long cable runs.
Summary of Best Practices for Integration
| Scenario | Pedal Placement Recommendation | Tips |
|---|---|---|
| Playing through tube or solid-state amp without effects loop | All pedals before amp input | Prioritize gain pedals first, modulations after, then time effects last |
| Using amplifier effects loop | Gain pedals before amp input, modulation/time effects in loop | Adjust loop level controls on amp for balance; use high-quality cables for noise reduction |
| Direct recording into interface | Pedals before DI, or record clean DI and reamp later | Use buffer or boost pedals to maintain signal quality; employ noise gates if needed |
| Using amp simulators/modelers | Pedals before amp sim or alongside in parallel chains | Capture dry tracks for maximum flexibility; experiment with pedal order in software |
By mastering these integration techniques, you ensure your pedals complement your amplifier and recording gear seamlessly. This facilitates a clean, rich, and dynamic guitar tone both on stage and in the studio, enabling you to express your musical ideas with clarity and professional polish.

Image courtesy of Alina Vilchenko
Common Mistakes and How to Avoid Them
Navigating the world of guitar pedals can be both exciting and overwhelming, but several frequent pitfalls can hinder your tone-shaping journey. Avoiding these common mistakes will save you frustration and help maintain a consistent, high-quality guitar signal throughout your setup.
1. Signal Loss Due to Poor Pedal Order or Cable Management
Many guitarists experience a dull or weak tone caused by excessive cable length, improper pedal placement, or lack of buffers. Long cable runs and multiple true bypass pedals can introduce high-frequency loss, making your tone sound muffled or lifeless. To avoid this:
- Use buffered pedals strategically, preferably at the start of your chain or integrated into your amp input, to preserve signal strength and clarity.
- Keep patch cables as short and low-capacitance as possible to reduce tone degradation.
- Organize pedal order thoughtfully to ensure that gain and EQ pedals maintain signal integrity throughout the chain.
2. Noise Issues and Interference
Unwanted hum, buzz, or crackling noises can ruin an otherwise perfect tone, usually stemming from power supply problems, ground loops, or poorly shielded cables. Here’s how to troubleshoot noise:
- Employ a dedicated, isolated power supply for your pedals to eliminate ground loop hum. Avoid daisy-chained or unregulated power adapters.
- Use high-quality, shielded cables and patch cords and regularly check connectors for wear or corrosion.
- Add noise gates or boost pedals with built-in gating features if your high-gain or fuzz pedals increase hiss or feedback.
3. Incompatible Pedal Combinations and Incorrect Placement
Not all pedals work harmoniously when combined; some effects can clash, causing muddy tones or blocking the clarity of other effects. Typical incompatibilities include placing time-based effects before distortion pedals or stacking multiple high-gain pedals without proper level balancing. To avoid tone clutter and maintain articulation:
- Follow conventional signal chain orders where overdrive/distortion pedals precede modulation and time-based effects unless you’re intentionally experimenting for unique textures.
- Adjust individual pedal volume and gain settings to ensure smooth transitions between effects rather than sudden jumps or dropouts.
- Test combinations in your home setup before gigging to understand how each pedal affects the overall sound and dynamics.
4. Overloading Power Supplies and Inadequate Voltage Matching
Pedals require specific voltage and current for optimal performance. Using incorrect power adapters or overloading a power supply’s capacity can lead to pedal failure or degraded sound quality. To prevent power-related issues:
- Verify each pedal’s voltage and current requirements and match them carefully with your power source.
- Choose power supplies that offer regulated and isolated outputs to avoid interference and ensure a stable power flow.
- Avoid mixing battery-powered pedals and powered pedals without checking polarity and voltage compatibility.
By recognizing these common mistakes and implementing the outlined troubleshooting strategies, you preserve your guitar’s tonal integrity and enjoy a smoother, more inspiring pedal-playing experience. This proactive approach empowers you to confidently build and refine your pedalboard while avoiding tone-damaging pitfalls.

Image courtesy of Kelly
Creative Sound Design and Experimental Applications
Pushing the boundaries of guitar tone shaping with pedals invites you into a playground of sonic exploration where conventional rules give way to innovation. Embracing unconventional pedal uses and combining effects in novel ways allows you to discover truly unique sounds that become your signature voice. Don’t hesitate to experiment beyond standard pedalboard setups—some of the most compelling guitar tones arise from deliberate rule-breaking and creative combinations.
Unconventional Pedal Uses to Inspire Innovation
- Reverse Signal Routing: Try looping your guitar through multiple pedals in a feedback loop or routing effects out of usual order to generate unexpected textures and soundscapes.
- Using Gain Effects as Volume Pedals: Drive a distortion pedal lightly to act as a dynamic boost or subtle volume swells, producing expressive dynamics rather than just saturation.
- Modulation Pedals to Shape Distortion: Place chorus or phaser pedals before distortion to modulate the greeting harmonic content or create swirling, saturated layers.
- Utilizing EQ Pedals for Frequency Sweeps: Rapidly automate mid or high-frequency boosts to mimic wah-like sounds or emphasize evolving tonal shifts.
Combining Effects for Signature Sounds
Crafting a personal, unmistakable tone often comes from layering pedals in ways that complement and transform each other, such as:
- Modulation into Delay: Feeding a lush chorus or flange pedal into a detailed delay creates moving echoes that float organically, perfect for ambient or psychedelic styles.
- Stacked Overdrives with Subtle Reverb: Layer soft clipping pedals with a touch of reverb to create warm, inviting textures that retain clarity but shimmer with depth.
- Fuzz and Octave Pedal Pairing: Blend a fuzzy distortion with an octave pedal to generate thick, synth-like tones that stand out in heavier, experimental genres.
- Noise and Feedback Manipulation: Intentionally integrating noise gates with distorted or fuzz pedals can sculpt controlled feedback and sustain, adding character and tension to solos or drones.
By actively exploring nontraditional pedal arrangements, programming expression pedal sweeps for evolving parameters, and integrating looper pedals to build layered textures, you unlock a vast realm of creative potential. This fearless experimentation fosters a deeply personal guitar tone that pushes sonic boundaries, enriching your playing style and gear integration with innovative musical expression.

Image courtesy of Kelly
Maintaining and Upgrading Your Pedal Setup: Keeping Your Tone Fresh and Evolving
To ensure your guitar tone remains consistent, vibrant, and evolving over time, regular maintenance and thoughtful upgrades of your pedalboard are essential. Whether you use analog stompboxes or cutting-edge digital multi-effects, proactive care and periodic enhancement will preserve the integrity of your sound and extend your gear’s lifespan.
Essential Pedal Maintenance for Optimal Performance
-
Regular Cleaning: Dust, dirt, and grime accumulation can degrade switch responsiveness and cause scratchy pots or noisy jacks. Use a soft, dry cloth and compressed air to clean pedal surfaces and connectors. Periodically check input/output jacks and power connectors for corrosion or looseness, addressing issues promptly to avoid signal loss or noise.
-
Battery and Power Supply Management: For battery-powered pedals, replace batteries regularly to prevent leaks that damage internal components. Use high-quality, isolated power supplies for all pedals to maintain clean, stable voltage and reduce unwanted hum or interference.
-
Firmware Updates for Digital Pedals: Many modern digital pedals, including multi-effects and modeling units, receive firmware updates that can add features, fix bugs, or improve sound quality. Check manufacturer websites routinely and apply updates following their guidelines to keep your digital gear operating at peak performance.
Strategic Upgrades to Evolve Your Pedalboard
-
Expanding Your Pedal Palette: Introduce new pedals gradually, choosing effects that complement your current tone and open creative possibilities. Experiment with boutique or cutting-edge pedals featuring unique circuits or algorithms to refine your sound further.
-
Power Supply Enhancements: Upgrade to higher-quality power units with more isolated outputs or higher current capacity to support expanding pedal setups while minimizing noise.
-
Cabling and Patch Cable Quality: Replace aging cables with low-capacitance, high-shielding wiring as your rig grows. This helps preserve signal clarity and eliminates intermittent audio dropouts.
-
Leveraging Multi-Effects and Programmable Switchers: As your experience deepens, consider integrating programmable switchers or multi-effects units to streamline complex setups and enable instant preset recall during live performance or studio sessions.
By committing to routine pedalboard maintenance, staying current with firmware updates, and thoughtfully upgrading your gear and power infrastructure, you keep your guitar tone fresh, responsive, and rich with new sonic possibilities. This ongoing investment in your pedal ecosystem ensures your sound evolves alongside your musical expression, fueling creativity and performance excellence for years to come.

Image courtesy of Andrea Piacquadio