Looper Pedals Explained: How to Use Them for Guitar Mastery
Category: Guitar Gear
Unlock the Power of Looper Pedals for Your Guitar Playing
If you've landed here, you're likely a guitar enthusiast eager to explore new dimensions in your playing, whether you're a beginner or an experienced musician looking to enhance your live sets or practice routine. Looper pedals have become essential tools that allow guitarists to record, layer, and manipulate sounds in real-time — a gateway to creativity, improvisation, and complex arrangements without a backing band. The challenge is often knowing where to start: how do you use a looper pedal effectively? What features should you look for? How can looper pedals fit into different music styles and production setups? This guide is designed specifically for guitar players like you who want a clear, actionable framework to master looper pedals. We'll break down their functions, setup tips, common techniques, and creative uses in a way that’s hands-on and accessible. Unlike generic product pages or brief tutorials, this post will help you understand not just the “how” but also the “why,” empowering you to confidently incorporate looping into your music-making. Read on to transform your gear knowledge and unlock new sonic possibilities with looper pedals.
- Unlock the Power of Looper Pedals for Your Guitar Playing
- What is a Looper Pedal? Understanding the Basics and Core Functions
- Types of Looper Pedals: From Simple to Multi-Track Looping
- Setting Up Your Looper Pedal: Essential Gear and Signal Chain Integration
- Step-by-Step Guide to Using a Looper Pedal: Recording, Overdubbing, and Playback
- Creative Techniques with Looper Pedals: Building Layers, Effects, and Live Performance Tips
- Common Challenges and Troubleshooting Tips for Seamless Looping
- Using Looper Pedals for Practice and Songwriting: Enhancing Your Musical Workflow
- Advanced Looper Features: Tempo Sync, Reverse Loops, and MIDI Integration
- Popular Looper Pedal Models Compared: What’s Best for Your Style and Budget
- 1. Boss RC-1: Best Starter Looper for Beginners
- 2. TC Electronic Ditto X4: Versatile and Feature-Rich for Intermediate Players
- 3. Boss RC-300: Multi-Track Powerhouse for Professionals
- 4. Electro-Harmonix 45000: Innovative and Studio-Oriented Multi-Track Looper
- How to Choose the Right Looper Pedal for Your Needs
- Incorporating Looper Pedals into Music Production: Tips for Home Studio Setup
What is a Looper Pedal? Understanding the Basics and Core Functions
At its core, a looper pedal is a compact, user-friendly device that allows guitarists to record a phrase or riff and play it back repeatedly, creating a seamless loop. This simple yet powerful function enables musicians to build complex, layered soundscapes live, without the need for additional instruments or prerecorded tracks. By pressing the pedal’s footswitch, you can easily start recording your playing, then press again to instantly replay the recorded loop. Most looper pedals let you overdub new layers on top of existing loops, providing endless creative possibilities to experiment with harmony, rhythm, and texture.
Beyond basic recording and playback, many looper pedals offer advanced features such as adjustable loop length, tempo synchronization, reverse playback, and multiple loop storage slots. These core functions make looper pedals invaluable tools for practice, songwriting, live performance, and even music production. Whether you’re a solo performer wanting to simulate a full band or a producer looking to sketch out ideas efficiently, understanding how these fundamental functions work will help you unlock the true potential of looping technology. In the upcoming sections, we’ll break down how to leverage these features effectively to elevate your guitar playing and creative workflow.
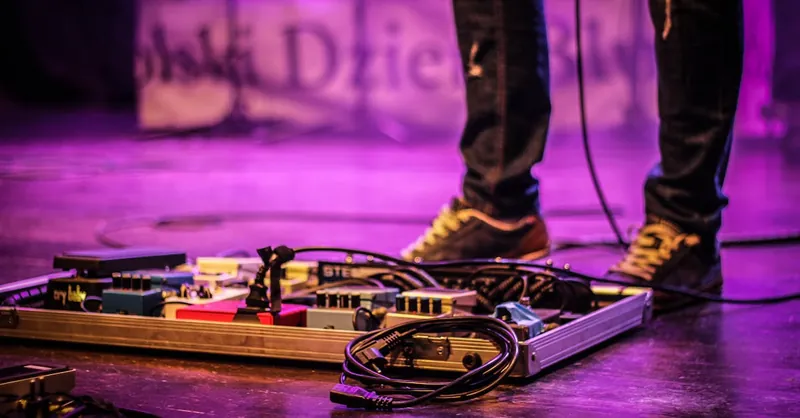
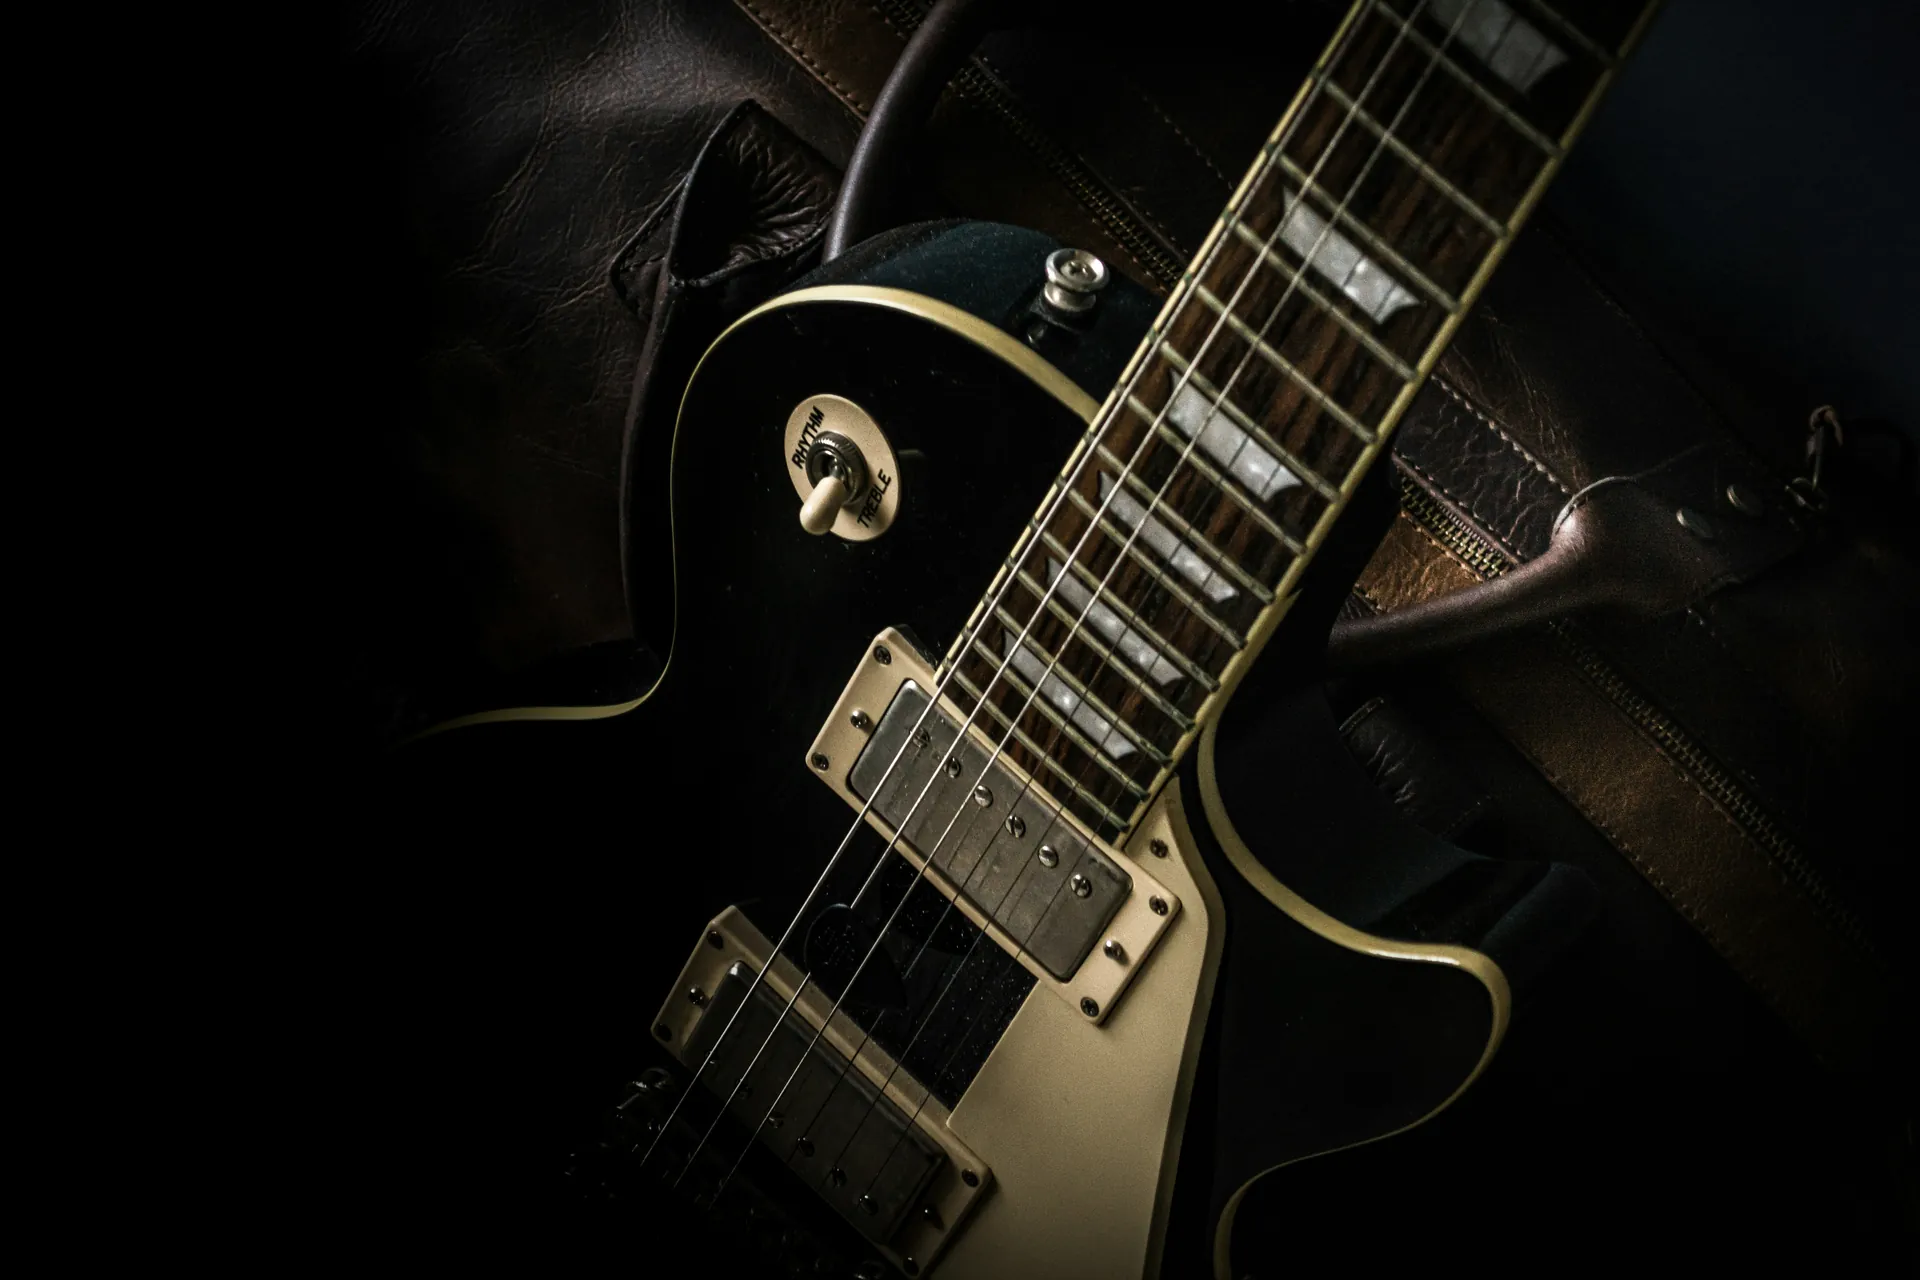
Image courtesy of Bartek Leszczyński
Types of Looper Pedals: From Simple to Multi-Track Looping
Looper pedals come in a variety of designs and feature sets, ranging from basic single-track loopers to sophisticated multi-track looping stations. Understanding the differences between these types is essential to choosing the right pedal for your guitar playing style, workflow, and musical goals.
Simple Loopers: Ideal for Beginners and Practice
At the entry level, simple loop pedals focus on straightforward looping functionality: record, overdub, and playback a single loop. These pedals usually have one or two footswitches and limited or no internal memory for storing loops. They’re perfect for beginners, casual jamming, or live practice sessions where ease of use and quick setup matter most. Some staples in this category include the BOSS RC-1 and Ditto Looper, which emphasize hands-free operation and instant looping without overwhelming parameters.
Intermediate Loopers: Added Features and More Storage
Moving beyond basics, intermediate looper pedals provide expanded features such as multiple loop slots, tempo sync, undo/redo functions, and longer recording times. These loopers allow for more creative freedom and structured looping during live sets or songwriting. For example, the BOSS RC-3 and TC Electronic Ditto X4 offer loop storage and versatile footswitch control to enhance performance dynamics.
Multi-Track Loopers: For Complex Arrangements and Production
For guitarists ready to build layered arrangements or multi-instrumental setups, multi-track loopers deliver the highest level of control. These pedals enable separate recording and manipulation of multiple tracks or loops independently—much like a mini digital audio workstation on your pedalboard. Features often include loop synchronization, extensive overdubbing, separate volume and effects controls per track, and integration with MIDI or external gear. Popular multi-track loopers like the BOSS RC-300 or Electro-Harmonix 45000 empower musicians to create rich compositions live or in the studio, blurring the lines between performance and production.
Choosing between these types depends largely on your current needs and future aspirations. Beginners and hobbyists benefit most from simple, intuitive loopers that encourage exploration without complexity. Intermediate players seeking to expand their looping capabilities will appreciate the added features and memory that enhance live performances and creativity. Meanwhile, professionals and music producers often gravitate toward multi-track loopers for their unparalleled flexibility and control over complex musical arrangements. By understanding these categories, you can confidently select a looper pedal that fits your style, workload, and sonic ambitions.

Image courtesy of cottonbro studio
Setting Up Your Looper Pedal: Essential Gear and Signal Chain Integration
Before you dive into looping, properly setting up your looper pedal and integrating it smoothly into your signal chain is crucial for achieving the best sound quality and workflow efficiency. At its core, the setup process involves connecting your guitar to the looper and routing the output to your amplifier or effects chain in a way that maximizes tonal clarity and allows seamless control during performance or practice.
Essential Gear for Your Looper Setup
To get started, ensure you have the following essential gear ready:
- Reliable instrument cables – High-quality 1/4" TS cables to connect your guitar, looper pedal, and amplifier.
- Power supply – A stable power source (typically 9V DC) designed for your pedal model to avoid noise and interruptions.
- Amplifier or PA system – Depending on your playing context, either a guitar amp or a PA for live sound reinforcement.
- Additional effects pedals (optional) – If you use distortion, delay, reverb, or modulation, consider how these interact with your looper in the signal chain.
Integrating the Looper Within Your Signal Chain
Where you place your looper pedal in your signal chain significantly affects how loops interact with other effects and how you control layers. The two most common placements are:
-
At the end of your effects chain: Placing the looper pedal last means that all preceded effects (distortion, modulation, delay, reverb) are recorded onto the loop exactly as heard. This is ideal if you want your loop to contain the full processed sound.
-
At the beginning of the chain, before effects: Placing the looper first records dry guitar signals and then passes the looped sound through subsequent effects pedals. This method allows you to apply effects dynamically to the looped parts live, giving greater flexibility in tone shaping during playback.
Pro Tip:
Experiment with both placements to find the setup that best suits your playing style and artistic goals. For example, rhythmic delay or reverb effects are often preferable after looping, while drive and distortion pedals commonly come before the looper for a more natural feel and better tracking.
Basic Signal Chain Example
- Guitar → 2. Overdrive/Distortion → 3. Modulation Effects (Chorus, Phaser) → 4. Delay → 5. Looper Pedal → 6. Amplifier
This chain preserves the tonal character of your effects within the loops and leaves room to layer creatively.
By carefully selecting your gear and thoughtfully integrating your looper pedal into your signal path, you build a foundation for smooth looping operations, greater sonic control, and enhanced musical expression. Proper setup also minimizes technical frustrations, freeing you to focus fully on performance and creativity.
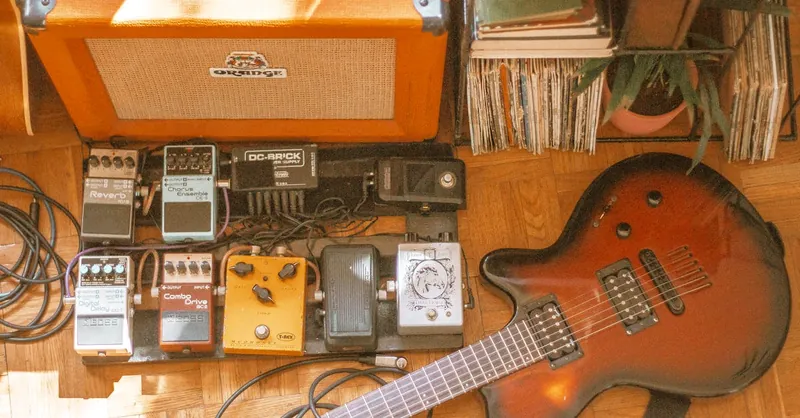
Image courtesy of Alina Vilchenko
Step-by-Step Guide to Using a Looper Pedal: Recording, Overdubbing, and Playback
Mastering the fundamental controls of your looper pedal is essential to fully harness its creative potential. While each model might have slight variations, the core process of recording, overdubbing, and playback follows a straightforward pattern that any guitarist can quickly learn and apply.
1. Recording Your First Loop
- Start with a clean slate. Ensure your looper pedal is in a ready state, often indicated by a blinking or solid LED.
- Press the footswitch once to begin recording your guitar phrase or riff. Play confidently; the pedal captures everything you perform from the moment you engage the recording.
- Press the footswitch again to stop recording and initiate playback. Your loop will now play back seamlessly in a repeating cycle.
This initial step lays down a foundation or a rhythmic/tonal bed for your performance or practice session.
2. Overdubbing Additional Layers
- Once the initial loop is playing, press the footswitch again to enter overdub mode. Every note you play on top of the loop will be recorded and layered, thickening the sound and expanding your musical arrangement.
- Repeat overdubbing as desired to build complex textures, harmonies, or counter-rhythms.
- Most looper pedals let you undo the last overdub by double-tapping or holding a footswitch, giving you flexibility and control without stopping the flow of creativity.
3. Playback Control and Loop Management
- To stop the loop playback, press the footswitch twice or hold it down (depending on your pedal model).
- Use features like loop length adjustment or tempo synchronization (if available) to refine the timing and feel.
- Many pedals provide multiple loop slots or banks, allowing you to save and switch between different loops on the fly, which is incredibly useful during live performances or complex practice routines.
Pro Tips for Smooth Looping
- Practice transitioning between recording, overdubbing, and playback smoothly to maintain timing and avoid jarring stops.
- Start with simple riffs or chord progressions to build confidence before layering intricate parts.
- Use a metronome or an external tempo source when available to keep loops perfectly in sync, especially when combining with other instruments or backing tracks.
By internalizing these fundamental steps, every guitarist can transform a looper pedal from a simple gadget into a powerful musical companion — enabling real-time composition, layering, and looping artistry that enhances practice, songwriting, and live performances.
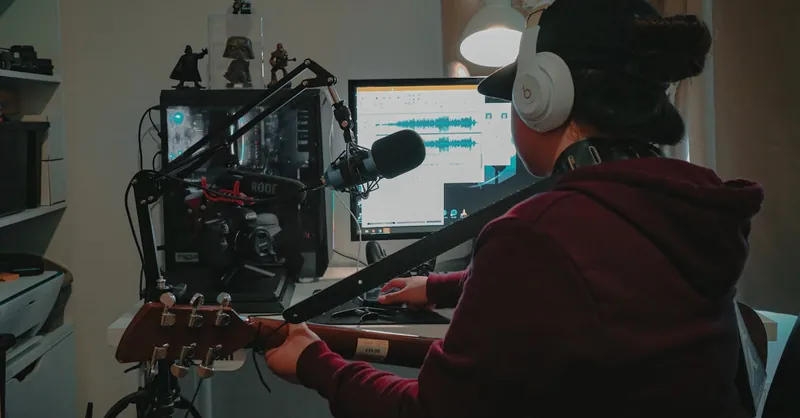
Image courtesy of Arianne Cresta Corpuz
Creative Techniques with Looper Pedals: Building Layers, Effects, and Live Performance Tips
Once you master the fundamentals of your looper pedal, it’s time to unleash creative techniques that elevate your guitar playing and live performances. Looper pedals are more than just recording devices—they are powerful tools for crafting dynamic soundscapes, experimenting with effects, and engaging audiences with captivating arrangements.
Building Layers: From Simple to Complex Arrangements
Start by mastering layering techniques that transform a basic riff into a full-bodied composition. Consider these tips:
- Start with rhythm or chordal loops: Lay down a steady groove or chord progression as the foundation.
- Add melodic and harmonic layers: Overdub lead lines, counter-melodies, or harmonies on top of your base loop.
- Incorporate percussive elements: Use palm mutes, muted strums, or tapping techniques to create rhythm parts that enhance groove.
- Use dynamics strategically: Build interest by gradually adding or removing layers, creating tension and release during your performance.
By thoughtfully building and arranging layers, you create engaging musical journeys that keep listeners hooked—even when playing solo.
Creative Use of Effects with Loopers
Leveraging external effects in tandem with your looper pedal can dramatically enhance your sound palette:
- Place modulation and ambient effects (chorus, delay, reverb) after the looper to wash your loops in texture and spatial depth during playback.
- Experiment with real-time effect changes: Activate or bypass pedals while loops play to add movement and variation to your layers.
- Use reverse, half-speed, or pitch-shift functions (if your looper supports them) to manipulate loops creatively and add surprise elements.
- Try looping with wah, volume swells, or envelope filters applied live to inject expression and sonic variety.
Live Performance Tips for Looping Guitarists
Playing live with a looper pedal requires a blend of technical skill and stage presence:
- Plan your loops and transitions in advance to maintain smooth flow and avoid awkward silences.
- Use clear footswitch commands (such as double-taps for undo or holds for stop) so you can multitask confidently without disrupting performance.
- Use multiple loop banks or decks (on advanced loopers) to switch between song sections or different arrangements effortlessly.
- Harness the power of tempo sync and quantization features to keep loops perfectly aligned with drum machines or backing tracks.
- Incorporate visual cues or count-ins to help stay locked in rhythm and enhance tightness during complex looping.
By integrating these creative techniques and performance strategies, you’ll unlock the full artistic potential of your looper pedal—opening up new horizons for improvisation, songwriting, and captivating solo shows. Whether practicing at home or commanding a stage, looper pedals enable guitarists to blur the line between musician and one-person band, delivering rich, layered soundscapes that inspire and engage every audience.

Image courtesy of cottonbro studio
Common Challenges and Troubleshooting Tips for Seamless Looping
While looper pedals are powerful tools for guitarists, they can sometimes present challenges that disrupt the flow of your performance or practice. Understanding these common issues and how to troubleshoot them ensures you maintain seamless looping without losing momentum or creativity. Here are some of the key hurdles guitarists face with looper pedals and practical tips to overcome them:
1. Timing and Sync Issues
One of the most frequent challenges for beginners and even experienced players is loop timing. Pressing the footswitch too early or late can cause loops to sound off-beat or out of sync, breaking the groove.
- Practice with a metronome or use your looper’s built-in tempo sync feature to lock loop timing precisely.
- Count beats internally before starting to record, or give a slight preparatory count-in using tapping or nodding.
- Start with short, simple rhythmic phrases and gradually increase complexity as your timing improves.
2. Audio Clipping and Noise Problems
Unwanted noise, such as hums, buzzes, or clipping distortion, can interfere with loop clarity, especially when layering multiple overdubs.
- Use high-quality cables and a reliable power supply to minimize electronic interference.
- Adjust your guitar volume and pedal output levels to avoid overdriving the looper’s input.
- Place noise gates or buffer pedals in your signal chain if your looper doesn’t have built-in noise suppression.
- Check for ground loops or faulty connections that can introduce unwanted noise.
3. Footswitch Control Mistakes
Since looping requires precise footswitch presses, it’s easy to accidentally stop or erase loops during live performance.
- Learn your pedal’s footswitch functions thoroughly, including undo, stop, and clear commands, often accessed by double-taps, long presses, or multiple footswitches.
- Practice smooth, deliberate foot movements to avoid mis-timing pedal operation.
- Consider a looper pedal with multiple footswitches if your current model limits control options, especially for complex live setups.
4. Loop Storage and Playback Confusion
When using loop pedals with multiple loop slots or banks, it’s common to lose track of stored loops or accidentally overwrite important loops.
- Organize your loops by labeling or numbering them outside of the pedal to keep track during rehearsals.
- Familiarize yourself with how your looper manages loop memory and use the save/load functions efficiently.
- Before live shows, prep and rehearse switching between loops to enhance confidence during performance.
5. Signal Chain Conflicts
Improper placement or routing of the looper pedal in your effects chain can cause tone loss, tracking issues, or unexpected sound behavior.
- Experiment with placing the looper either before or after effects pedals depending on whether you want to loop dry or processed sounds.
- Test your signal chain with and without the looper active to identify any signal degradation points.
- Use a dedicated loop switcher or ABY box for complex rigs to maintain signal integrity.
By proactively addressing these common challenges, guitarists can achieve smooth and professional looping experiences in both practice and live environments. Building confidence through consistent troubleshooting accelerates mastery of your looper pedal and frees you to focus fully on creative expression.

Image courtesy of Tomaz Barcellos
Using Looper Pedals for Practice and Songwriting: Enhancing Your Musical Workflow
Looper pedals aren't just performance tools—they are incredibly powerful aids for accelerating your practice routine and fostering creativity during songwriting sessions. By incorporating a looper into your daily playing, you can transform simple practice exercises into dynamic, multi-layered musical experiments that deepen your understanding of rhythm, harmony, and arrangement.
Amplify Your Practice Sessions
Practicing with a looper pedal offers unique benefits that elevate your skills faster than traditional methods:
- Develop Timing and Rhythm Precision: Recording and looping chord progressions or riffs forces you to play in sync with a consistent groove. This improves your internal clock and metronome feel dramatically.
- Master Chord Transitions and Scales: Looping a backing rhythm allows you to freely practice lead lines, scales, and improvisation over a steady foundation, creating a one-person jam session whenever you want.
- Refine Technique with Immediate Feedback: Hearing your loops play back instantly helps identify weak spots in timing, tone, or articulation, enabling focused improvement.
- Build Layered Exercises: Challenge yourself to overdub complementary parts such as harmonies, rhythmic accents, or percussive elements, which enhances coordination and multi-tasking on the guitar.
Spark Songwriting Creativity
Using a looper pedal in songwriting ignites new ideas and establishes a seamless musical workflow from concept to arrangement:
- Capture Spontaneous Ideas: Quickly record riffs or chord patterns as they come, eliminating the frustration of losing fleeting inspiration.
- Experiment With Arrangement: Looping allows you to test song structures by layering different parts (verse, chorus, bridge) before committing them to recording.
- Create Unique Textures: By overdubbing multiple layers, you can discover unexpected harmonic or rhythmic combinations that provide fresh songwriting directions.
- Work Solo Without Boundaries: A looper empowers you to build complex compositions alone, acting like a virtual bandmate that responds in real-time.
Best Practices for Efficient Looping Workflow
- Keep Loops Simple to Start: Begin with a solid foundation—a clean chord progression or rhythmic pattern—to avoid clutter and maintain clarity in your ideas.
- Set Clear Goals for Each Layer: Whether practicing a new lick or testing a melody, have a purpose for every overdub to keep practice effective and focused.
- Use Loop Length and Tempo Controls: Adjust loop length and tempo settings on your pedal to match your song’s feel and avoid unwanted repetition fatigue.
- Record With Effects Mindfully: Decide if you want to capture dry guitar tones or processed sounds, depending on whether you want flexibility in post-production or an immediate performance-ready loop.
Integrating looper pedals into your practice and songwriting unlocks a powerful synergy that accelerates skill development, fuels inspiration, and streamlines your creative process. Leveraging the interactive nature of looping makes every session more engaging and helps you cultivate a unique musical voice fueled by experimentation and layered expression.

Image courtesy of Pavel Danilyuk
Advanced Looper Features: Tempo Sync, Reverse Loops, and MIDI Integration
As you delve deeper into the world of looper pedals, unlocking advanced features can dramatically expand your creative possibilities and professional workflow. Many modern loopers go beyond basic recording and overdubbing to include tempo synchronization, reverse loop playback, and MIDI integration, each offering powerful tools for precision, experimentation, and seamless gear connectivity.
Tempo Sync and Quantization for Perfect Timing
One of the most valuable features in advanced loopers is tempo sync or loop quantization. This function automatically aligns your loop's length and playback speed to a set tempo or an external clock source, such as a drum machine or metronome. For guitarists playing in a band or integrating with other electronic instruments, tempo syncing ensures loops never drift out of sync, maintaining tight rhythmic cohesion throughout your performance or recording session. Additionally, quantization can help offset human timing inaccuracies by snapping loop start and end points to precise beat intervals, making your looping feel more polished and professional.
Reverse Loops and Creative Playback Manipulation
Many modern looper pedals offer reverse playback or the ability to play recorded loops backwards. This feature injects a unique, otherworldly quality into your loops and opens up imaginative sound design possibilities. Guitarists can use reverse looping to create ethereal textures, simulate tape effects, or introduce surprising twists in live sets. Combined with overdubbing and real-time effects, reverse loops enhance the sonic palette, encouraging experimentation with timing, phrasing, and harmonic layering in ways traditional looping cannot achieve.
MIDI Integration for Enhanced Control and Sync
For guitarists looking to integrate their looper pedals with complex rigs or digital audio workstations (DAWs), MIDI integration is a game-changer. MIDI-capable loopers can receive clock signals, start/stop commands, and program changes from external devices, allowing for:
- Synchronized looping with drum machines, sequencers, and backing tracks
- Remote control of loop functions via MIDI foot controllers or DAW automation
- Advanced preset management for switching between loop setups and effects efficiently
This level of control is especially beneficial for professional musicians and producers who want to synchronize looping with multi-instrument performances or studio sessions, ensuring tight timing and streamlined workflow across all gear.
By leveraging these advanced looper features—tempo sync, reverse loops, and MIDI integration—guitarists elevate their looping from a simple tool to a sophisticated component of modern music production and live performance setups. Understanding and incorporating these capabilities expands not only your technical proficiency but also your artistic horizons, empowering you to create more intricate, polished, and innovative musical experiences.
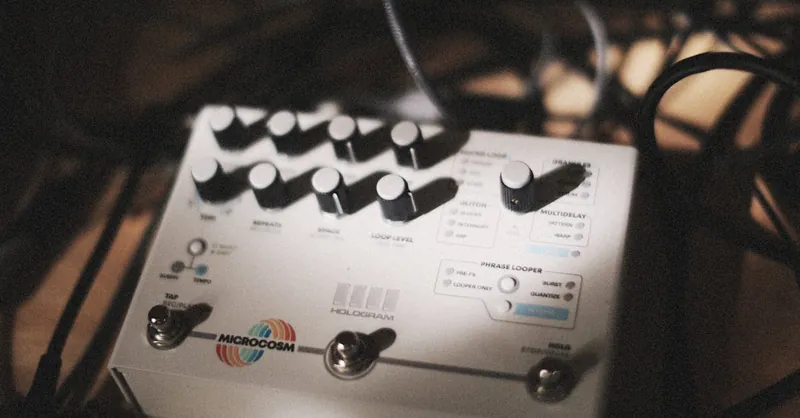
Image courtesy of Alexey Demidov
Popular Looper Pedal Models Compared: What’s Best for Your Style and Budget
Choosing the right looper pedal can significantly impact your playing experience, creativity, and overall musical workflow. To help you find the perfect match, we’ve compared some of the most popular looper pedals on the market, highlighting their standout features, ideal use cases, and affordability. Whether you're a beginner looking for simplicity or a professional requiring extensive control, this comparison will guide you toward the best pedal for your style and budget.
1. Boss RC-1: Best Starter Looper for Beginners
The Boss RC-1 stands out as a go-to entry-level looper pedal, celebrated for its straightforward operation and reliability. With a single footswitch and clear LED indicators for recording and playback, it's designed to be intuitive, making it perfect for guitarists new to looping.
- Key features: 12 minutes of recording time, straightforward recording/playback controls, and compact durable build.
- Best for: Beginners, practice sessions, and simple live loop layering.
- Price point: Affordable, providing excellent value without overwhelming features.
2. TC Electronic Ditto X4: Versatile and Feature-Rich for Intermediate Players
The Ditto X4 elevates looping with two independent loop tracks, built-in effects, and flexible footswitch control, catering to guitarists who want to experiment without complexity.
- Key features: Dual loop tracks, 5 minutes per loop, onboard effects like reverse and half-speed, and MIDI sync capabilities.
- Best for: Intermediate players seeking expanded layering, creative live performance options, and integration with broader rigs.
- Price point: Mid-range, balancing robust features with user-friendly design.
3. Boss RC-300: Multi-Track Powerhouse for Professionals
As the industry standard for multi-track looping, the Boss RC-300 offers three synchronized stereo tracks with dedicated volume faders, extensive loop memory, and MIDI functionality.
- Key features: Three independent tracks, phrase memory slots, built-in effects, extensive recording time, and MIDI support.
- Best for: Professional musicians, live performers, and studio producers who demand full control over complex looping arrangements.
- Price point: Premium, reflecting its comprehensive capabilities and durability.
4. Electro-Harmonix 45000: Innovative and Studio-Oriented Multi-Track Looper
The Electro-Harmonix 45000 merges advanced multi-track looping with stopwatch-style controls, enabling precise loop management, overdubbing, and independent track manipulation.
- Key features: Four loops with separate modulation and level control, effects send/return loops, digital clock display, and stereo I/O.
- Best for: Experimental players and producers looking for studio-quality looping with tactile precision.
- Price point: Premium, suitable for musicians prioritizing advanced workflow features.
How to Choose the Right Looper Pedal for Your Needs
When selecting a looper pedal, consider these factors to ensure it aligns with your musical style and budget:
- Simplicity vs. Complexity: Beginners typically benefit from pedals like the Boss RC-1 or Ditto series, while advanced users may prefer multi-track pedals with more control.
- Loop Length and Tracks: Think about your typical looping style—do you need single loops or multiple independent tracks?
- Performance Features: Look for capabilities like undo/redo, tempo sync, effects integration, and MIDI depending on your live or studio needs.
- Portability and Durability: If you gig frequently, consider pedals with rugged construction and straightforward controls.
- Budget Constraints: Balance your desired features with affordability; entry-level loopers are often sufficient for practice and small gigs, while investing in professional models makes sense for extensive live setups or recording.
By aligning these criteria with the models highlighted above, you can confidently select a looper pedal that empowers your guitar playing style and creative ambitions without overspending.
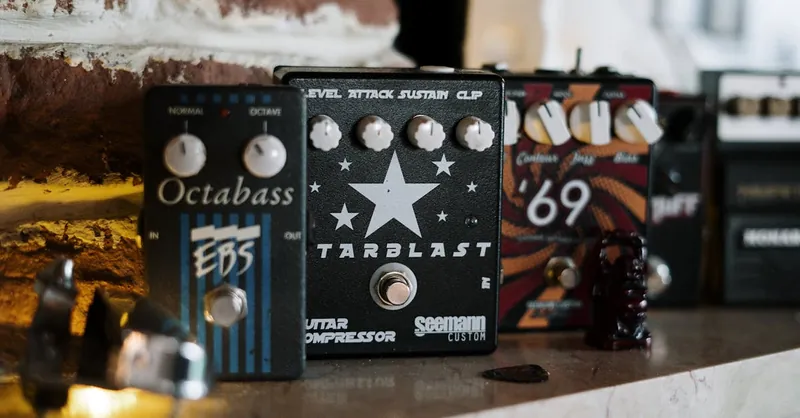
Image courtesy of cottonbro studio
Incorporating Looper Pedals into Music Production: Tips for Home Studio Setup
Using looper pedals in a home studio environment can dramatically enhance your music production workflow by allowing you to build complex arrangements, experiment with layering, and capture spontaneous ideas in real time. To integrate a looper pedal effectively into your home studio setup, start by connecting it within your audio interface chain. This often means routing your guitar signal or other instruments through the looper, then feeding the output into your audio interface inputs for direct recording alongside other tracks in your DAW (Digital Audio Workstation).
Key Tips for Optimizing Looper Pedals in Home Studios
- Leverage Direct Recording: Run your looper pedal’s output directly to your audio interface to capture clean, looped performances. This ensures high-quality digital recordings that you can edit and manipulate later.
- Use Headphone Monitoring: Headphone monitoring helps you accurately hear each layer you build with your looper without latency or bleed from external speakers, improving timing and precision during overdubs.
- Integrate with DAW and MIDI: If your looper supports MIDI synchronization, connect it to your DAW or external MIDI controllers to align loops perfectly with your project tempo and automate loop control for more streamlined recording sessions.
- Experiment with Effects Routing: In a studio environment, experiment with placing your looper either before or after external effects processors or software plugins. This flexibility allows you to capture loops with raw guitar tones or fully processed effects, giving you more options during production.
- Utilize Loop Storage and Export: Many loopers allow you to store loops internally or export them as audio files via USB or SD card. Use this feature to transfer loops easily into your DAW for further arrangement and mastering.
By thoughtfully incorporating looper pedals into your home studio setup, you unlock a hybrid approach blending live looping spontaneity with robust studio production techniques. This integration enhances creativity, streamlines idea development, and expands your sonic palette—turning your home studio into a versatile environment for both composing and producing layered, professional-quality music tracks.

Image courtesy of Jakub Zerdzicki