
Beginner Guitar Chords Guide: Easy Steps to Start Playing
Category: Guitar Gear
Your Ultimate Beginner Guitar Chords Guide Awaits
Starting your guitar journey can feel overwhelming with so many chords, finger positions, and progressions to learn. Whether you picked up your first guitar yesterday or have tried before but got stuck, this guide is tailored specifically for you—the beginner eager to master foundational guitar chords with confidence and clarity. You’ve landed here because you want straightforward, actionable advice that cuts through the noise, helping you play your favorite songs sooner. Unlike generic tutorials, this guide breaks down chord basics, finger positioning, strumming tips, common chord progressions, and essential practice routines, all framed to fit the learning curve of new guitarists. We understand your frustration with complicated jargon and unclear instructions; here you’ll find easy-to-follow steps and insider tips that make the process enjoyable and motivating. Whether you're into acoustic strumming or craving to explore different styles, you’ll gain skills that unlock new musical doors and build your playing foundation. Read on to transform those puzzling chord diagrams into fluid chord changes and realise your musical potential faster than you imagined possible.
- Your Ultimate Beginner Guitar Chords Guide Awaits
- Understanding the Basics: Anatomy of the Guitar and How It Affects Chord Shapes
- How to Read Chord Diagrams and Tablature
- The Essential Beginner Chords: Major and Minor Open Chords
- Tips for Proper Finger Placement and Avoiding Common Mistakes
- Strumming Patterns and Rhythm Basics for Chord Playing
- Transitioning Between Chords Smoothly: Exercises and Drills
- Exploring Simple Chord Progressions to Play Your First Songs
- Using Capo and Alternate Tunings for Beginner Chord Variations
- Incorporating Effects and Gear Basics to Enhance Chord Tone
- Next Steps: Advancing Your Chord Knowledge and Integrating Music Theory
Understanding the Basics: Anatomy of the Guitar and How It Affects Chord Shapes
Before diving into chord shapes, it’s crucial to understand the anatomy of your guitar and how its parts influence finger positioning and sound. The guitar neck consists of six strings stretched over frets—metal strips that divide the fingerboard into semitone intervals. Each string is numbered from 1 (thinnest, high E string) to 6 (thickest, low E string), with standard tuning from low to high being E-A-D-G-B-e. This standard tuning forms the foundation for most beginner chords and progressions.
Knowing string numbers helps you follow chord diagrams accurately, as these diagrams show which strings to press or mute and where along the fretboard your fingers should land. Frets closer to the guitar body produce higher notes; pressing down a string just behind a fret changes the pitch by raising it a half step per fret. Understanding this basic structure will make it easier to visualize and memorize chord shapes, ensuring your fingers land cleanly on the correct strings without accidentally muting others. Mastering the relationship between string tuning, numbering, and fret placement is a vital first step toward playing clear, resonant chords that sound great every time you strum.
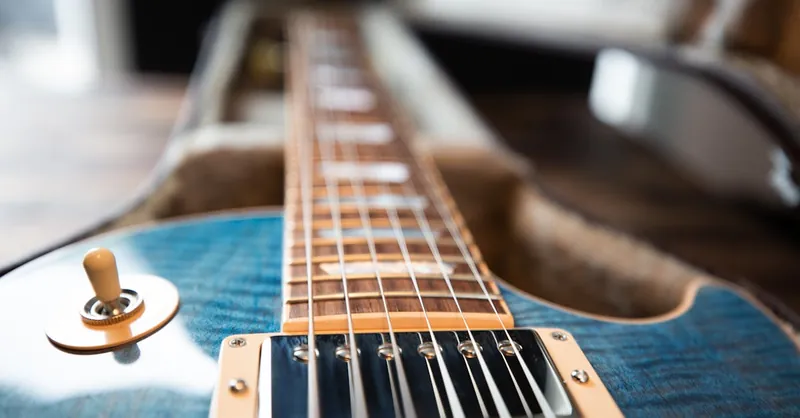
Image courtesy of Rene Terp
How to Read Chord Diagrams and Tablature
One of the first hurdles for beginner guitarists is deciphering chord diagrams and tablature (tab)—the universal languages of guitar notation. Understanding these visual tools is essential for learning chords accurately and progressing efficiently. Let’s break down how to read them correctly to set you up for success.
Reading Chord Diagrams
A chord diagram is a simplified visual map of the guitar’s fretboard showing where to place your fingers to form a chord. Here’s what you need to know:
- The vertical lines represent the six guitar strings, from left to right: 6th (low E), 5th (A), 4th (D), 3rd (G), 2nd (B), and 1st (high e) string.
- The horizontal lines indicate the frets. The top line usually represents the nut (the guitar’s start before the first fret), or in some cases, specific fret numbers if the chord is played higher up the neck.
- Numbers or dots on the strings show the finger placement, with dots on particular frets. Next to the diagram, you'll often see finger numbers:
- Index finger
- Middle finger
- Ring finger
- Pinky finger
- An “O” above a string means play that string open (no fingers pressing down).
- An “X” above a string indicates you should mute or avoid playing that string.
Understanding Tablature (Tab) Notation
Guitar tablature is another highly popular tool that uses numbers on horizontal lines to show exactly where to place your fingers on the fretboard:
- The six horizontal lines represent the strings, with the bottom line as the 6th string (low E) and the top line as the 1st string (high e).
- Numbers on these lines tell you which fret to press. For example, a “0” means play the string open, “2” means press down on the second fret.
- Tabs often accompany chord diagrams or full song notation and can also indicate picking or strumming patterns.
By mastering how to read chord charts and tablature, beginners can unlock the ability to learn new songs faster and with greater accuracy. Practice interpreting these diagrams daily, and soon identifying finger positions and transitions will become second nature, accelerating your overall guitar skill development.
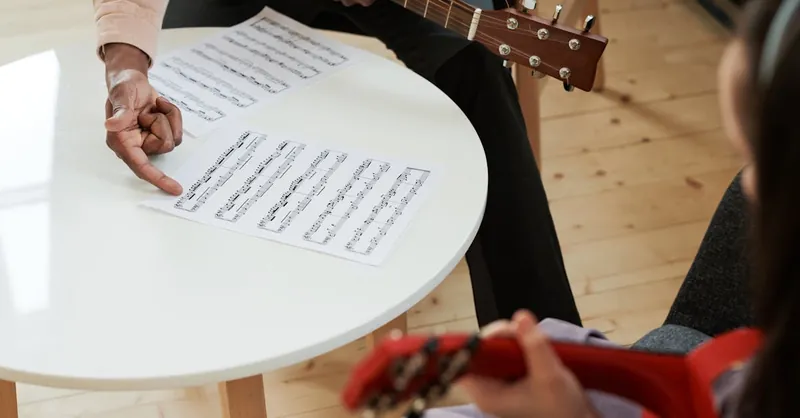
Image courtesy of Boris Pavlikovsky
The Essential Beginner Chords: Major and Minor Open Chords
Mastering major and minor open chords is the cornerstone of developing solid guitar skills. These chords form the foundation for countless songs across genres, making them indispensable for any beginner guitarist. The most essential chords you should focus on are C, G, D, E, and A major, along with their minor counterparts: Am, Dm, and Em. Open chords are called so because they use one or more open strings (strings played without pressing any fret), which helps create a fuller sound with fewer finger stretches—perfect for beginners.
Core Major Chords and Finger Placement
- C Major (C):
- Place your ring finger on the 3rd fret of the 5th string (A string).
- Middle finger on the 2nd fret of the 4th string (D string).
- Index finger on the 1st fret of the 2nd string (B string).
-
Strum from the 5th string down, letting the 3rd, 1st, and open strings ring.
-
G Major (G):
- Middle finger on the 3rd fret of the 6th string (E string).
- Index finger on the 2nd fret of the 5th string (A string).
- Ring finger on the 3rd fret of the 1st string (high e).
-
Strum all six strings fully for a rich, bright sound.
-
D Major (D):
- Index finger on the 2nd fret of the 3rd string (G string).
- Ring finger on the 3rd fret of the 2nd string (B string).
- Middle finger on the 2nd fret of the 1st string (high e).
-
Strum only the bottom four strings, avoiding the low E and A strings.
-
E Major (E):
- Middle finger on the 2nd fret of the 5th string (A string).
- Ring finger on the 2nd fret of the 4th string (D string).
- Index finger on the 1st fret of the 3rd string (G string).
-
Strum all six strings for a strong open chord.
-
A Major (A):
- Place your index, middle, and ring fingers side-by-side on the 2nd fret of the 4th (D), 3rd (G), and 2nd (B) strings respectively.
- Strum from the 5th string down, muting the thickest low E string.
Key Minor Chords and Finger Placement
- A Minor (Am):
- Index finger on the 1st fret of the 2nd string (B string).
- Middle finger on the 2nd fret of the 4th string (D string).
- Ring finger on the 2nd fret of the 3rd string (G string).
-
Strum the bottom five strings, muting the low E.
-
D Minor (Dm):
- Index finger on the 1st fret of the 1st string (high e).
- Middle finger on the 2nd fret of the 3rd string (G string).
- Ring finger on the 3rd fret of the 2nd string (B string).
-
Strum the bottom four strings only.
-
E Minor (Em):
- Middle finger on the 2nd fret of the 5th string (A string).
- Ring finger on the 2nd fret of the 4th string (D string).
- Strum all six strings open for a haunting, melancholic sound.
Tips for Clean Chord Playing
- Keep your fingertips curled and apply firm pressure just behind the fret to avoid muted or buzzing sounds.
- Use the pads of your fingers, not the flat section, to prevent touching and muting adjacent strings.
- Practice transitioning slowly between these chords to build muscle memory and accuracy.
By committing these major and minor open chords to memory and practicing their finger placements diligently, you set yourself up for success in playing a wide variety of songs and progressing quickly on your guitar journey. These chords are your gateway to rhythm playing, songwriting, and expanding into more complex chord shapes and styles.

Image courtesy of Brent Keane
Tips for Proper Finger Placement and Avoiding Common Mistakes
Achieving clean, clear guitar chords from the start hinges largely on proper finger placement and being mindful of habits that can cause muted or buzzing strings. One of the most important techniques for beginners is arching your fingers so that your fingertips press the strings right behind the fret, allowing the string to vibrate freely without touching adjacent strings. Flattened fingers will often mute neighboring strings, which leads to a muffled sound that breaks the smoothness of your chord.
Applying just the right amount of pressure is equally crucial. Press too lightly, and strings buzz or don’t sound clearly; press too hard, and your hand tires quickly, causing tension that slows down your progress. Aim for firm, consistent pressure without straining your fingers—over time, developing calluses will make this easier.
Another common mistake is thumb placement. Keep your thumb positioned roughly in the middle of the neck’s back, behind your fingers, to provide strong support without wrapping your thumb over the fretboard. This helps your fingers reach and form chords efficiently while maintaining healthy hand posture and avoiding strain or injury.
Finally, be vigilant about avoiding muted strings when strumming or picking. Check that your fingers don’t accidentally rest on strings you need to ring open, and be sure to mute or skip strings indicated with an “X” in chord diagrams. Developing consistent finger arching, balanced pressure, and proper thumb positioning will dramatically improve your chord clarity, making your playing sound more professional and polished from early on. Practicing these foundational habits daily will set the stage for mastering more complex chords and smoother transitions in no time.

Image courtesy of Burst
Strumming Patterns and Rhythm Basics for Chord Playing
Once you’ve become comfortable with your basic chord shapes and finger placement, the next crucial step is developing strumming patterns and rhythm skills to complement your chord changes. Strumming is what brings your chords to life, turning static shapes into dynamic rhythm that drives the groove of any song. For beginner rhythm guitarists, understanding simple strumming patterns and how they align with chord progressions is key to playing confidently and musically.
Easy Strumming Rhythms to Get You Started
Starting simple is always best. Here are three foundational strumming patterns that will help you lock in steady rhythm and make chord changes sound smooth and natural:
-
Downstrokes Only: Strum downwards on every beat. This pattern is great for beginners as it emphasizes timing and keeps rhythm straightforward. Try counting aloud “1, 2, 3, 4” and strum down on each count.
-
Down-Up Pattern: After mastering downstrokes, add upstrokes on the “and” counts between beats (e.g., “1 and 2 and 3 and 4 and”). This creates a flowing rhythm and helps you get used to the alternating motion of your strumming hand.
-
Basic Four-Beat Pattern: Combine downstrokes on beats 1 and 3 with down-up strokes on beats 2 and 4 for added groove — try strumming: “Down, down-up, down, down-up”. This pattern is commonly heard in countless pop and folk songs and serves as a great building block for more complex rhythms.
Tips for Developing Solid Rhythm
- Use a metronome: Practicing with a metronome trains your internal clock, helping you keep consistent timing as you transition between chords.
- Keep your strumming hand relaxed: Tension can make strumming uneven or choppy. A loose wrist and relaxed arm produce smoother, more natural rhythms.
- Mute strings between strums: Slightly resting the palm of your strumming hand on the strings can add percussive “chuck” sounds that improve groove and rhythm.
- Focus on downstroke clarity first: Ensure each downstrum rings clearly before adding more complex upstrokes or syncopated rhythms.
By integrating these basic strumming patterns and rhythm concepts into your practice routine, you’ll quickly enhance your ability to play full, musical chord progressions rather than isolated shapes. Rhythmic playing breathes emotion and energy into your guitar work, forming the foundation for styles like folk, pop, rock, and blues. As you develop speed and fluidity, experimenting with varied strumming patterns will also keep your rhythm guitar playing fresh and engaging for both you and your listeners.
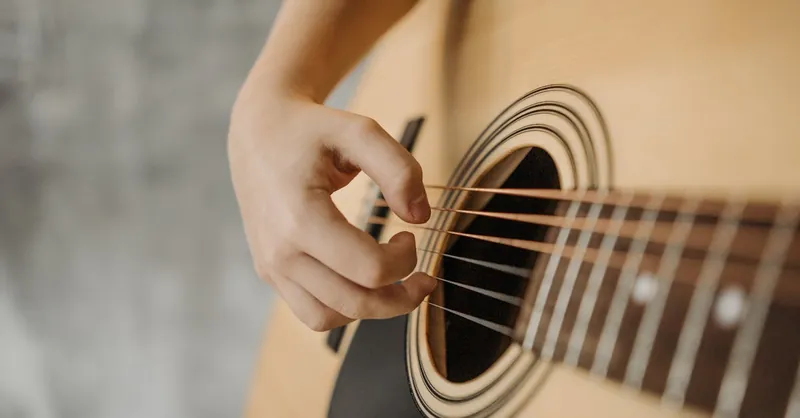
Image courtesy of Pavel Danilyuk
Transitioning Between Chords Smoothly: Exercises and Drills
One of the biggest challenges for beginner guitarists is switching between chords cleanly and quickly. Building muscle memory through focused exercises and deliberate practice is the key to mastering smooth chord transitions, which in turn makes your playing sound fluid and professional. Instead of rushing through chord changes, use these targeted drills to develop precision, timing, and finger independence.
Essential Exercises to Build Chord Transition Muscle Memory
-
Slow and Steady Shifts: Pick two basic chords (like G and C) and switch between them slowly, ensuring every note in the chord rings clearly. Start with a metronome set at a slow tempo (around 40-50 bpm). Play one chord per beat and gradually increase speed only once your fingers land accurately without buzzing or muted strings.
-
Chord Change Repetition: Focus on one pair of chords and repeat the transition continuously for 2-3 minutes. For example, go from D to A, then back to D. This repetition engrains the movement patterns into your muscle memory, making the changes automatic over time.
-
Finger Ladder Drill: Identify the fingers that move between chords and isolate their movement. For instance, when switching from Em to C, notice which fingers lift and which stay down. Practice lifting and placing those fingers independently before linking them with the rest of the hand.
-
Partial Chord Holds: Start by holding one chord completely, then only partially form the next chord to ease your fingers into the movement. Gradually build toward full chord formations as comfort and speed improve.
Tips to Make Chord Transitions Smoother
- Keep your fingers close to the fretboard when moving between chords to reduce wasted motion.
- Focus on economy of motion, minimizing finger lifts and repositioning.
- Use a metronome to maintain steady rhythm during transitions, preventing rushed or uneven timing.
- Practice regularly in short, focused sessions rather than long, unfocused ones to maximize retention.
- Always prioritize clean sound over speed; finesse comes before fast chord changes.
By incorporating these exercises into your daily practice routine, you will quickly develop the muscle memory and dexterity required for swift, clean chord changes. Smooth transitions not only improve your technical skills but also enhance your overall musicality, enabling you to confidently tackle a wider range of songs and styles.

Image courtesy of Brent Keane
Exploring Simple Chord Progressions to Play Your First Songs
Now that you’ve mastered the essential open chords and smooth chord transitions, it’s time to put them into musical context by learning simple chord progressions. Playing common progressions like G–C–D or A–D–E is one of the most effective ways to build confidence, improve rhythm, and start playing real songs quickly. These progressions form the backbone of countless hits in folk, pop, rock, and country music, making them an invaluable tool for beginner guitarists.
Common Beginner Chord Progressions to Practice
- G – C – D Progression:
-
This classic trio creates a bright, upbeat sound ideal for many beginner-friendly songs. Strum each chord for 4 beats before switching and focus on keeping steady rhythm throughout the progression. Examples of songs using this progression include "Leaving on a Jet Plane" and "Sweet Home Alabama."
-
A – D – E Progression:
-
Another fundamental progression found in blues, rock, and country styles. Practice switching cleanly between these chords, emphasizing consistent strumming and clear chord voicings. Songs like "La Bamba" and "Johnny B. Goode" showcase this progression.
-
C – G – Am – F Progression:
- Often called the “50s progression,” this four-chord loop adds a minor chord (Am) for emotional depth while remaining accessible for beginners. It’s widely used in pop ballads and folk tunes, making it great for expanding your playing repertoire.
How to Use These Progressions Effectively
- Start Slowly: Play each chord for several beats, focusing on clean finger placement and strong sound.
- Use a Metronome: Keeping consistent timing will greatly improve your rhythm and make chord changes feel more natural.
- Loop the Progressions: Repeating progressions continuously builds muscle memory and internalizes the feel of switching between chords rhythmically.
- Try Singing or Playing Along: Adding vocals or a backing track helps connect chord changes to musical phrasing and makes practice more engaging.
By practicing these simple but powerful chord progressions, you’ll not only strengthen your chord-changing skills but also gain the confidence to play actual songs from the very beginning. This hands-on approach accelerates your learning curve and lays the foundation for exploring more complex chords, strumming patterns, and musical styles as you advance.

Image courtesy of Photo By: Kaboompics.com
Using Capo and Alternate Tunings for Beginner Chord Variations
As you grow more comfortable with basic chords and chord progressions, introducing a capo and exploring alternate tunings can significantly expand your sonic palette and simplify playing in various keys. These techniques allow beginner guitarists to access new chord voicings, achieve richer sounds, and play songs that might otherwise be challenging with open chords.
What Is a Capo and Why Use One?
A capo is a small clamp-like device that you attach across all six strings at a chosen fret, effectively raising the pitch of each string by a half-step per fret. This simple tool enables you to:
- Play easier chord shapes in different keys: By placing the capo on a higher fret, you can use familiar open chord shapes to match the key of a song without learning complex barre chords.
- Expand your chord vocabulary quickly: Since open chords tend to sound fuller and more resonant, using a capo helps maintain that rich tone even when playing songs in challenging keys.
- Match your vocal range: Changing the key with a capo makes it easier to sing along without straining your voice.
For example, placing the capo on the 2nd fret and playing a G major shape actually produces an A major chord in pitch, allowing you to play in the key of A with simple chords. Beginners benefit immensely from practicing chord transitions and strumming with a capo as it builds confidence and accessibility.
Introduction to Alternate Tunings for Beginner Guitarists
Alternate tunings involve tuning one or more strings differently from standard tuning (E-A-D-G-B-e). While it may seem advanced, some basic alternate tunings can dramatically simplify chord formations and open up fresh harmonic possibilities without intricate fingerings. A few beginner-friendly alternate tunings include:
- Open D (D-A-D-F#-A-D): This tuning lets you play a D major chord by strumming all open strings, making slide and drone chord techniques easier.
- Open G (D-G-D-G-B-D): Popular in blues and folk, this tuning allows easy major chord shapes and encourages creative fingerpicking.
- Drop D (D-A-D-G-B-e): Only the low E string is tuned down to D, simplifying power chords and adding depth to your sound.
Using these tunings encourages ear training, creativity, and helps you discover chord shapes outside the standard framework. Starting with a capo and experimenting with just one or two alternate tunings can reinvigorate your practice sessions and inspire new song ideas, all while reinforcing your fundamental chord knowledge.
By integrating the capo and alternate tunings into your beginner guitar routine, you open doors to more versatile playing styles, easier access to different keys, and richer tonal options that keep your guitar journey engaging and rewarding.
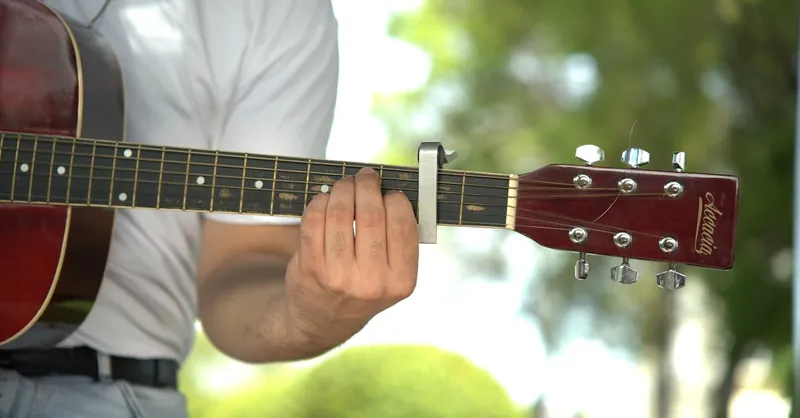
Image courtesy of Busenur Demirkan
Incorporating Effects and Gear Basics to Enhance Chord Tone
As you develop confidence with beginner guitar chords, exploring how effects pedals and amplifier settings can enhance your chord tone will unlock a whole new dimension in your playing. Even at an early stage, understanding basic gear options empowers you to shape your sound, add texture, and bring more expression into your rhythm guitar work.
Essential Guitar Effects Pedals for Chord Players
While many beginners focus primarily on chords and strumming, integrating a few key guitar effects pedals can drastically improve the sonic palette of your chord progressions:
- Reverb: Adds natural ambience and space to your sound, making chords feel fuller and more vibrant. Reverb settings like “room” or “hall” produce lush tones that complement acoustic or clean electric chords perfectly.
- Chorus: Creates a shimmering, thickening effect by slightly detuning and modulating your signal. Chorus enhances simple open chords with a rich, swirling texture often heard in pop and indie music.
- Overdrive: A mild overdrive pedal adds warmth and subtle grit to your chords without overwhelming the clean tone. This effect is essential for blues, rock, and country styles, adding character while preserving chord clarity.
- Delay: A short delay with minimal feedback can give rhythmic echoes that add depth and interest to sustained chord strumming, especially when playing slower progressions.
Basic Amplifier Settings to Complement Chord Playing
Your amplifier tone plays a critical role in making chords sound clear and balanced. Here are a few tips for dialling in your amp settings as a beginner:
- Set a clean channel or low gain: For chord-based playing, a clean or lightly driven amp channel preserves note definition, making each string's sound distinct.
- Adjust EQ controls: Boost the midrange frequencies moderately to highlight chord presence, while keeping bass moderate to avoid muddiness and treble adjusted to maintain sparkle without harshness.
- Use presence and reverb knobs wisely: Presence can add brightness and articulation, while reverb adds space; balancing these enhances chord resonance without washing out the tone.
- Keep volume balanced: Avoid pushing volume too high to prevent distortion blurring chord clarity; it’s better to play at moderate levels with well-defined tones.
Getting Started with Your Gear Routine
As a beginner, start simple by practicing chords with just your guitar and amp, then gradually experiment with one pedal at a time to hear how it affects your chord sound. Using a reverb pedal or amp reverb can immediately lift simple chord strumming, while a gentle overdrive enriches your tone when moving into more rhythmic genres. Remember, the goal is to enhance chord clarity and musicality, not overshadow your foundational technique.
By combining foundational chords with thoughtful use of effects pedals and amp settings, you not only improve your tone but also develop a personal sound that makes playing more inspiring. This early integration of gear basics supports your growth as a versatile guitarist, ready to explore diverse styles while maintaining great chord quality.
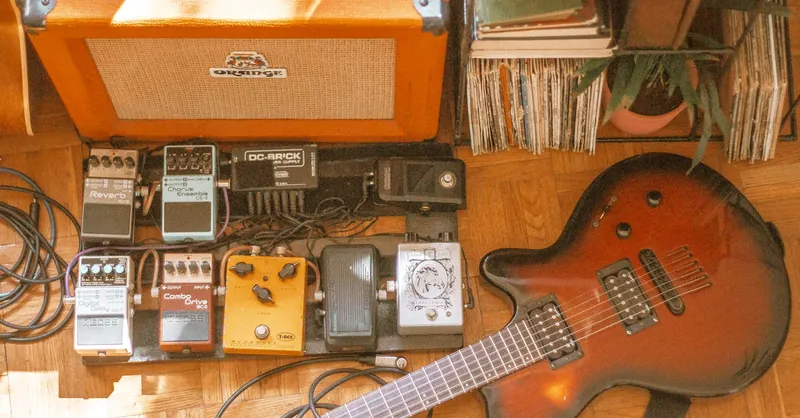
Image courtesy of Alina Vilchenko
Next Steps: Advancing Your Chord Knowledge and Integrating Music Theory
As you become comfortable with open major and minor chords, it's time to expand your chord vocabulary by incorporating more complex shapes such as barre chords and seventh chords, while deepening your understanding of music theory fundamentals related to chords. This progression not only enhances your technical skills but also opens the door to playing a wider variety of songs and styles with confidence.
Transitioning to Barre Chords
Barre chords are a critical milestone for any guitarist seeking versatility. Unlike open chords, barre chords require you to use one finger (usually the index) to press down multiple strings across a single fret, forming a movable chord shape that can be shifted up and down the neck. Mastering barre chords enables you to:
- Play chords in any key without relying on open strings.
- Incorporate powerful, clean major and minor chord voicings.
- Easily switch between rhythm and lead playing due to the compact hand shape.
Start by practicing the F major barre chord at the first fret—a common first barre chord for beginners. Focus on clean finger positioning, avoiding muted strings, and building finger strength gradually through daily practice.
Exploring Seventh Chords for Richer Harmony
Adding seventh chords to your repertoire instantly enriches your playing by introducing subtle emotional nuances often used in blues, jazz, and pop music. Common seventh chords include:
- Major 7th (maj7) – Adds a dreamy, smooth character.
- Dominant 7th (7) – Creates tension and bluesy feel.
- Minor 7th (m7) – Offers a softer, jazzy tone.
Learning these chords involves modifying familiar shapes by lifting or adding fingers, and understanding their role within chord progressions enhances songwriting and improvisation skills.
Integrating Basic Music Theory Concepts
A solid grasp of music theory related to chords will accelerate your progress and deepen your musical intuition. Focus on:
- Chord construction: Understand how chords are built from scales—triads formed by combining root, third, and fifth notes—and how adding sevenths or other tones changes their character.
- Key signatures and chord functions: Learn how chords relate to each other within a key (tonic, subdominant, dominant), which helps in creating smooth, musical progressions.
- Circle of Fifths: Use this tool to visualize key relationships and commonly paired chords, streamlining your ability to transpose songs or compose chord sequences.
By continuously integrating these theory insights with hands-on practice—like experimenting with barre and seventh chords in different keys—you solidify your foundational knowledge while gaining the flexibility to express complex musical ideas. This next phase bridges technical skill and creative exploration, positioning you well to tackle intermediate guitar challenges and diverse musical genres.

Image courtesy of Yan Krukau